· Devlog · 34 min read
Isle of Kani Devlog
Explore how I built an interactive 3D island in Three.js with animated trees, dynamic water, and a procedurally walking crab.

Introduction
Welcome! In this devlog I’ll cover details about each part of the project. Some parts have more or less depth, but I’ll keep to information that is hopefully interesting. Everything is organized here into logical sections (like crab, tree, water shader, etc) but when I made the project I jumped around between the different parts, so not everything is in perfect timeline order.
Ideation
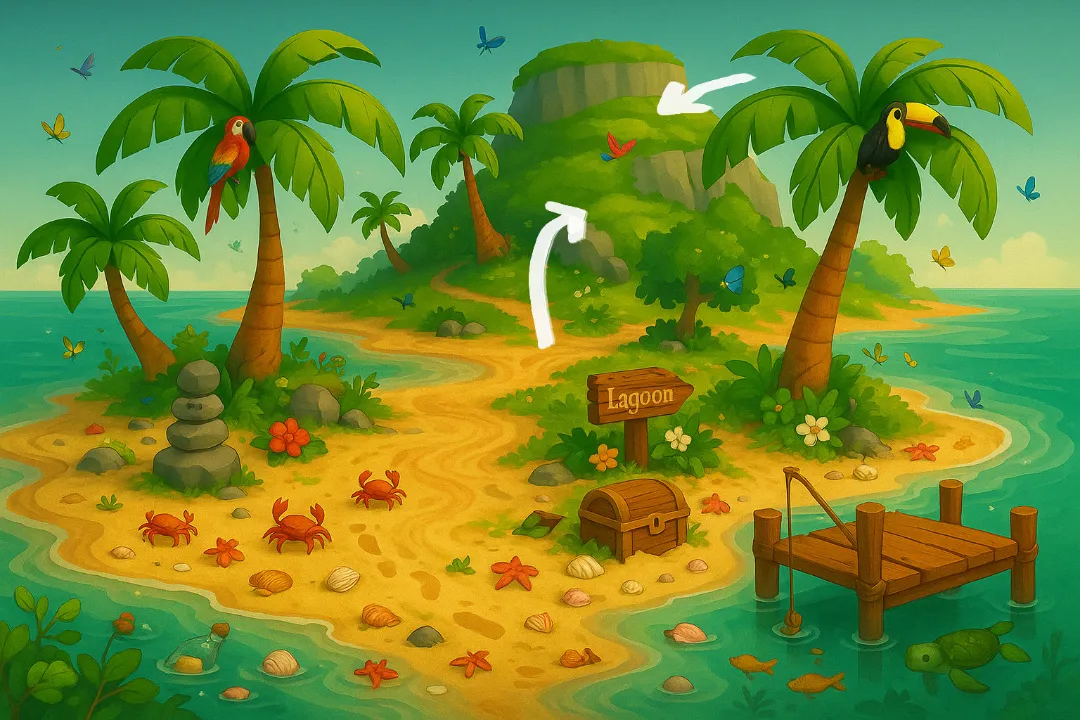
I started off using AI to generate some reference images of different shaped islands and experimented with different art styles. I wanted the island to have good composition and a focal point that the eye is directed to, but I also wanted there to be multiple activities available on the island.
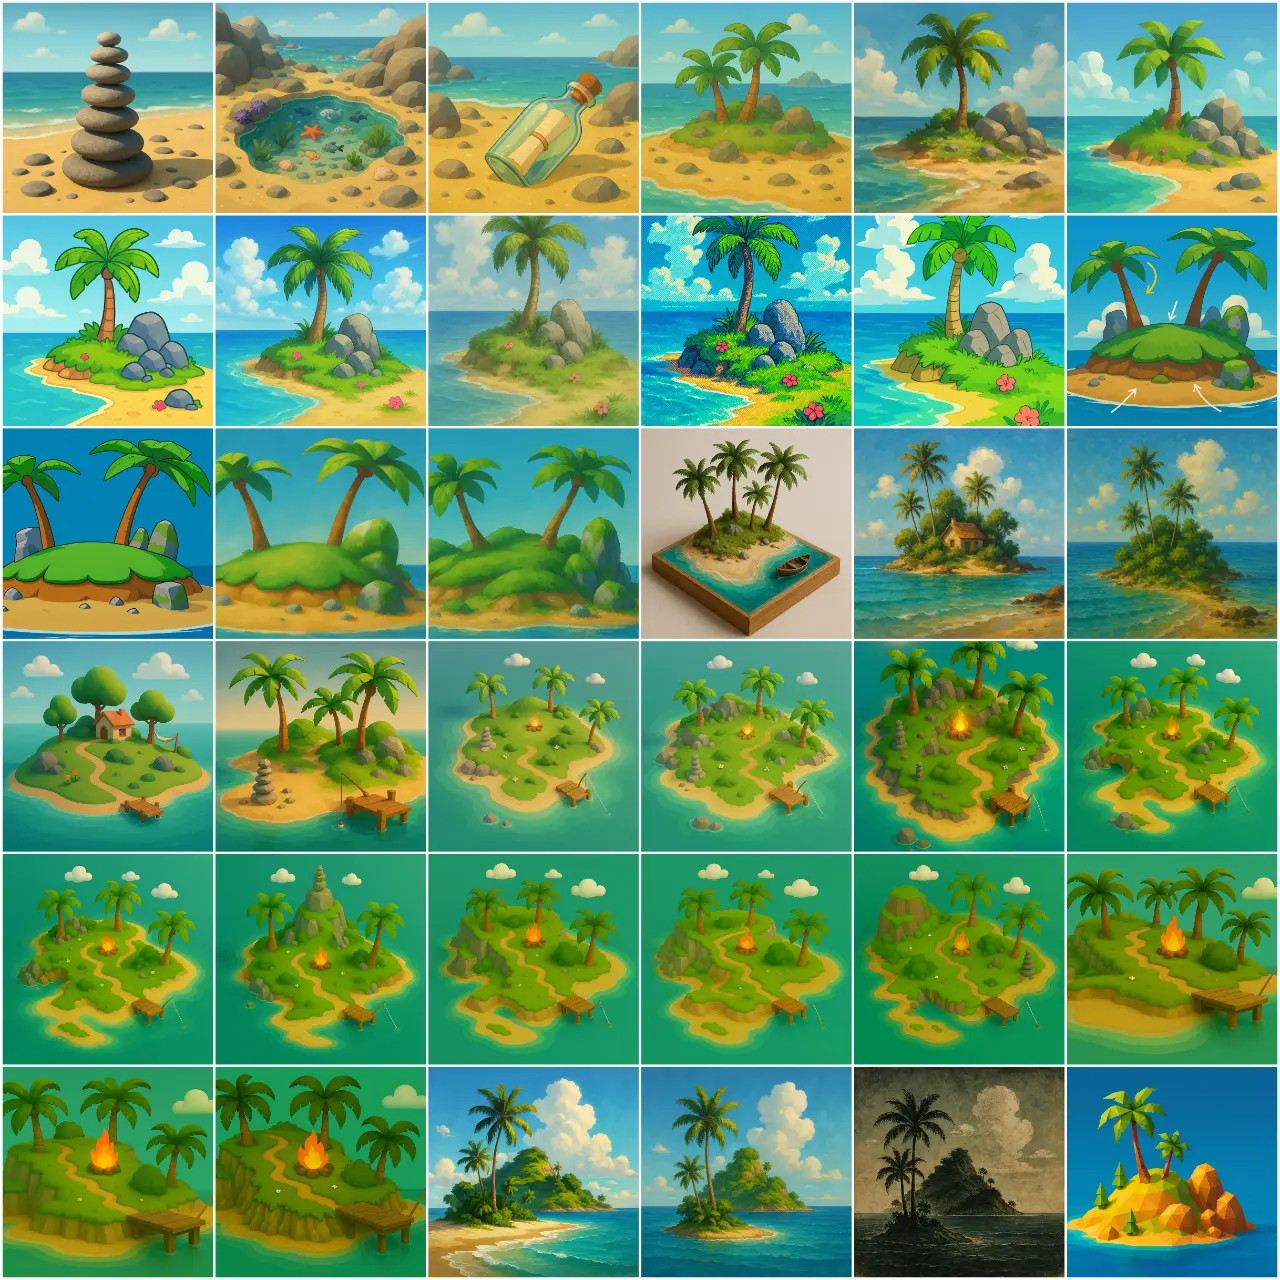
Here’s my overall vision for the island:
- Small but Polished - everything should be visible from one point
- POIs - Have multiple points of interest on the island
- Variation - different type of scenery, objects, interaction, etc.
- Alive - Make the island feel alive with as many interactive and dynamic elements as possible
- Finished product - nothing should feel like a work in progress at the end
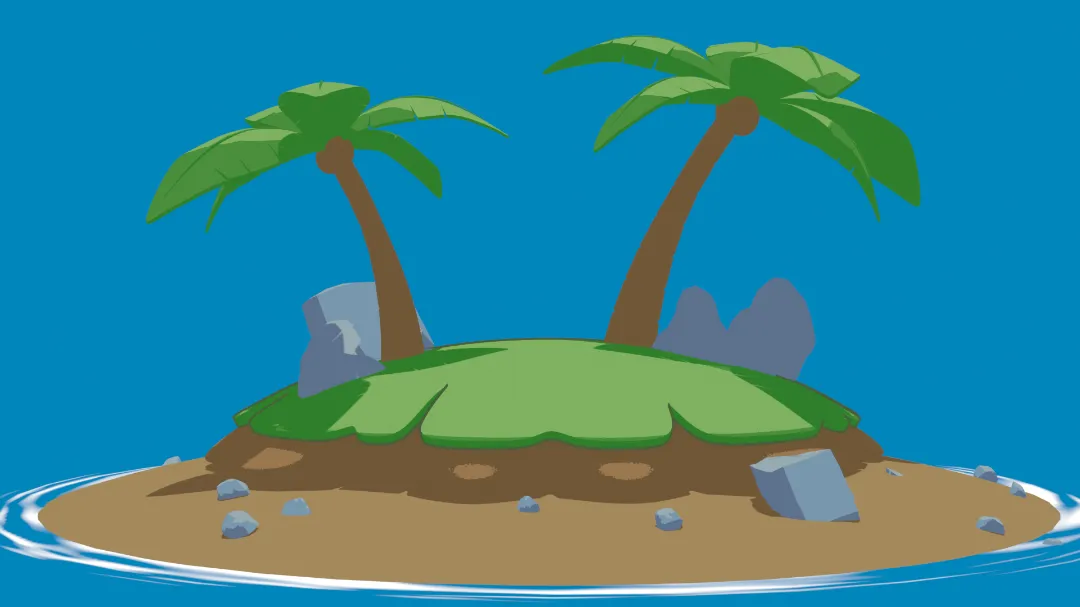
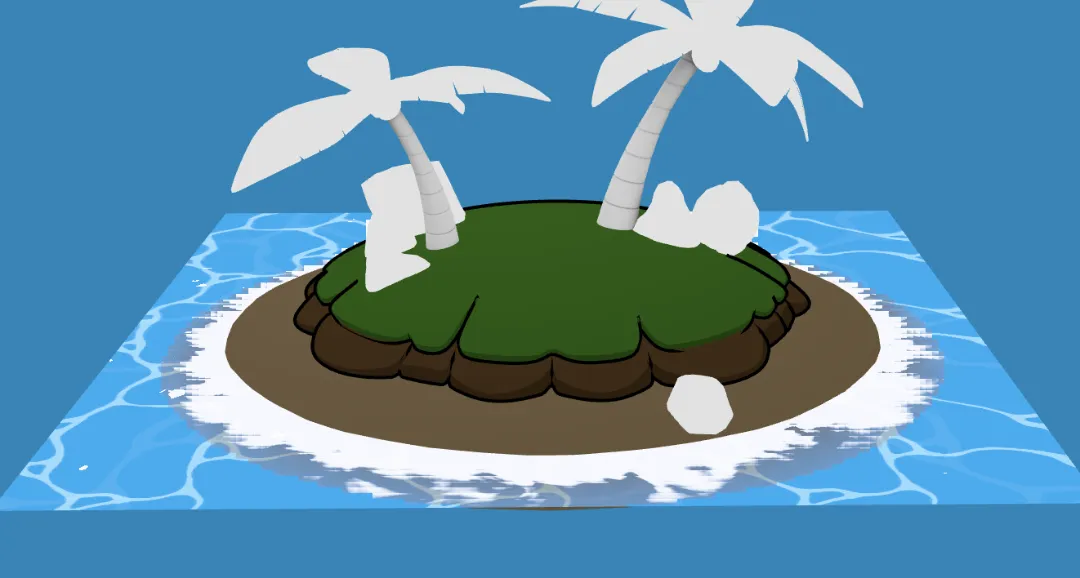
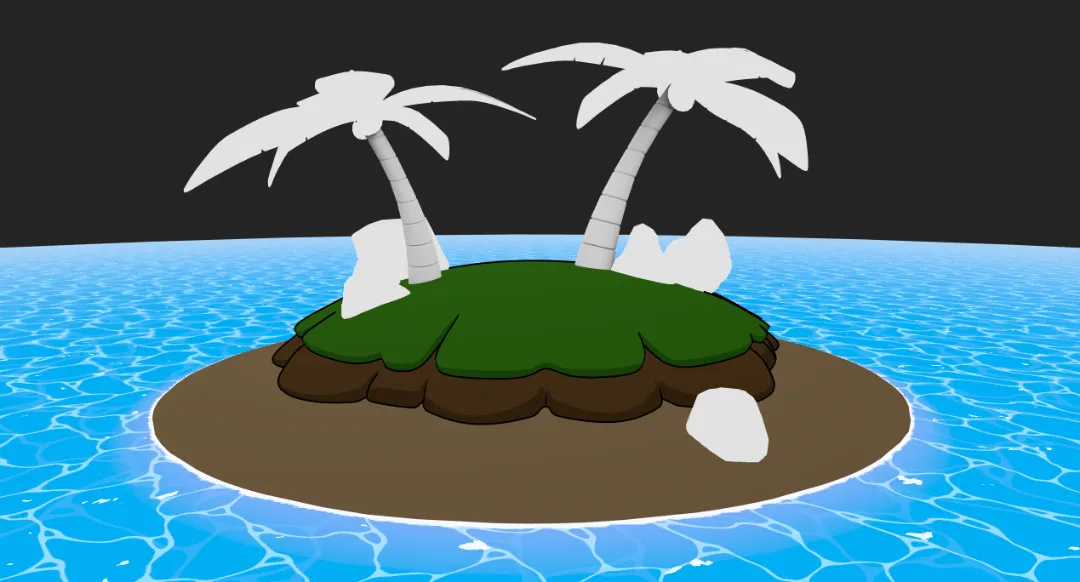
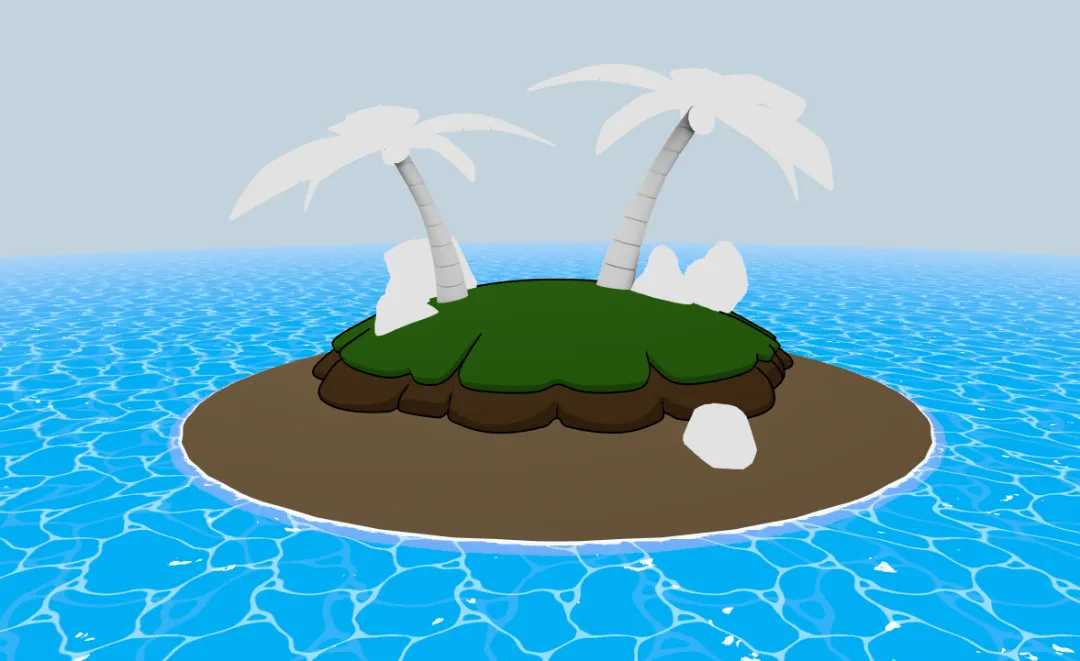
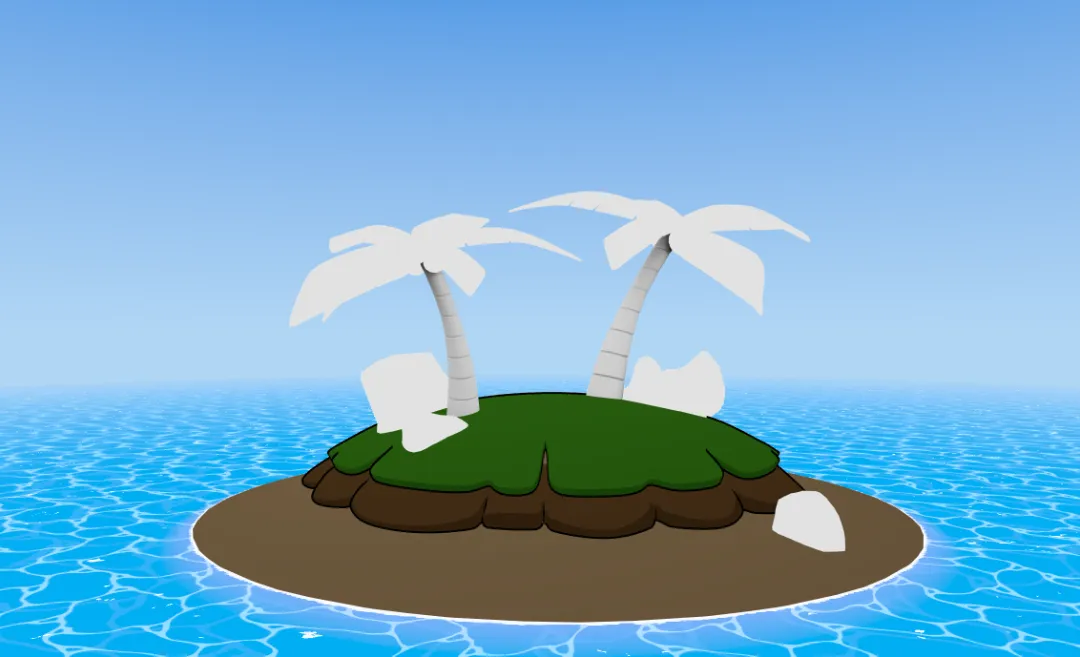
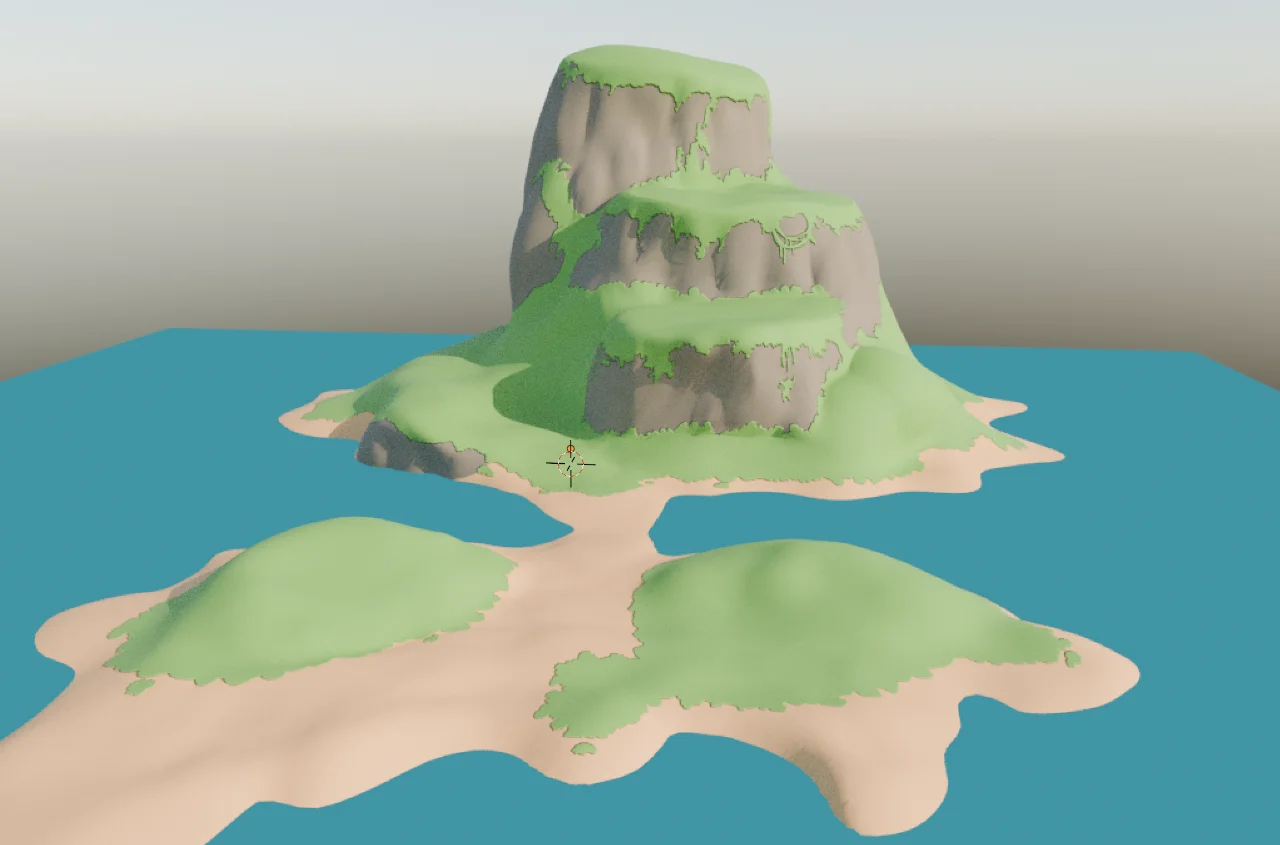
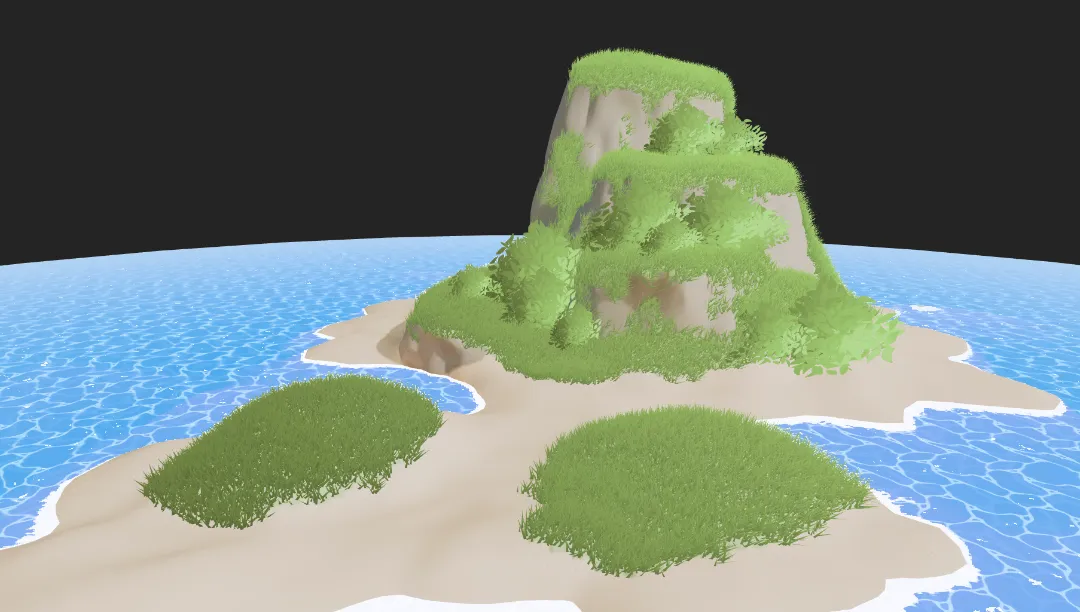
To get started, I created a simple island in blender and experimented with the shaders. The materials did not survive the journey from blender to threejs, but that’s fine since I’ll be doing most of the shader work further down the road.
Water Shader
I wanted a foamy edge where the water intersects with the island. That edge communicates interaction between water and other surfaces, so getting it right was crucial. In my research, the most common approach to water shaders with edge styling was to use a depth map to determine where the water mesh intersects with other objects and then put the edge foam in that area (usually adjusted by noise textures).
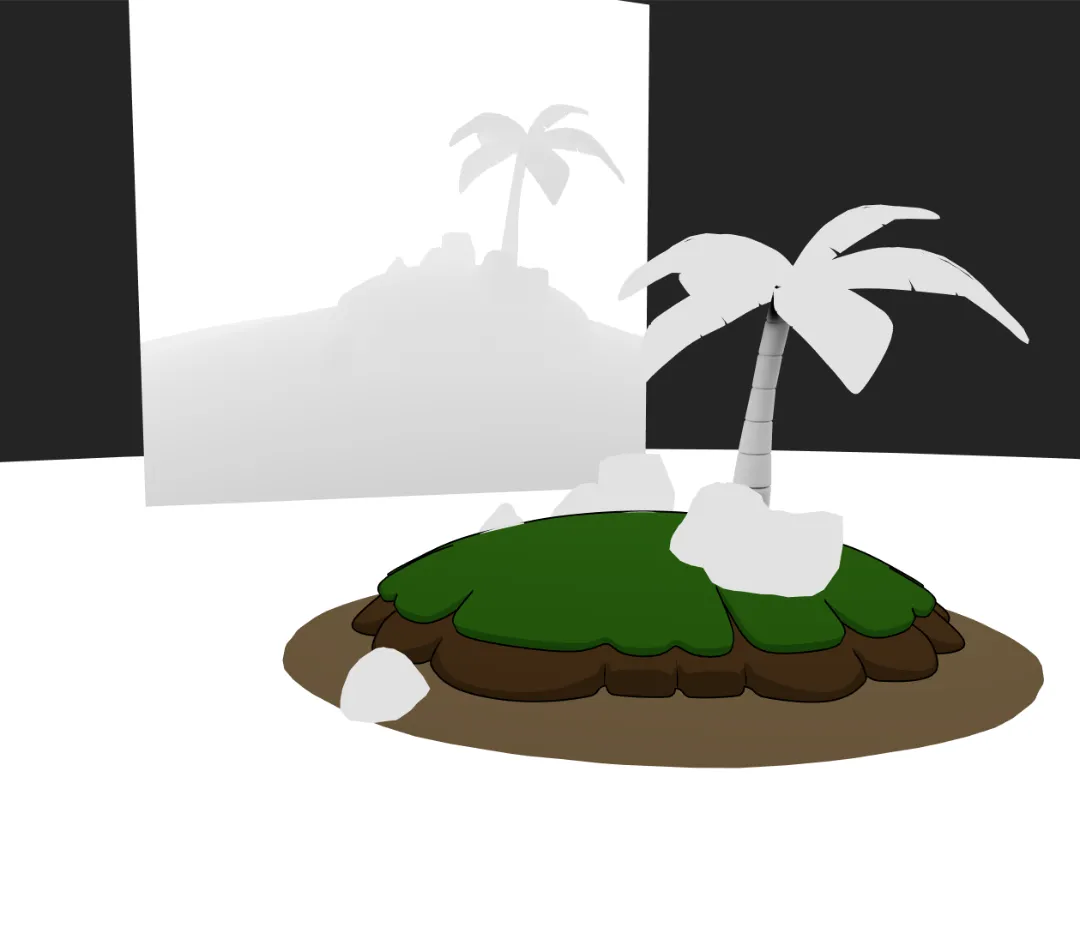
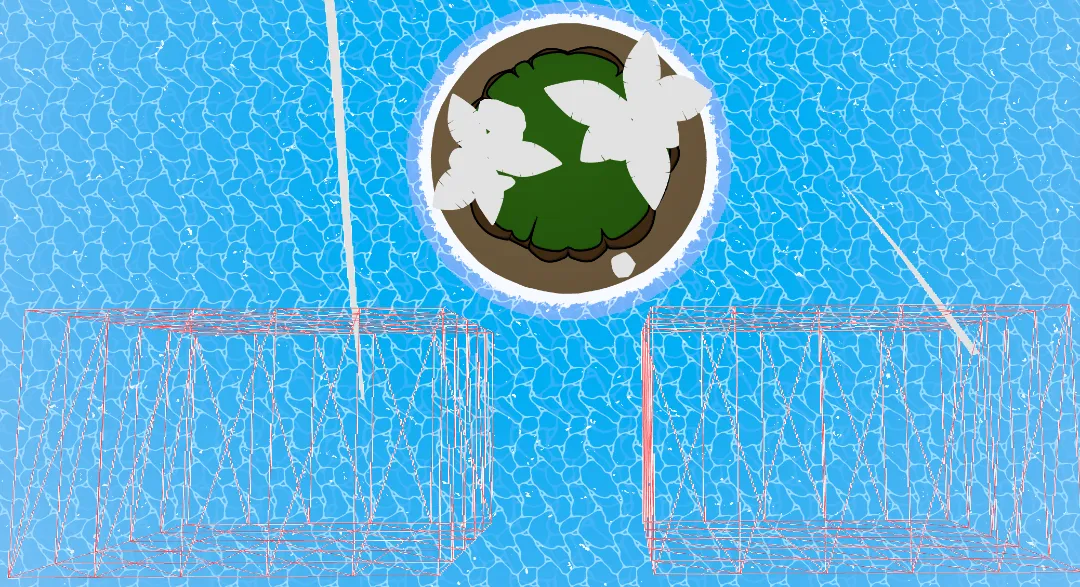
Here’s the scene with a depth buffer being generated and displayed on a plane in the background. The idea is that how light or dark each pixel is in the depth image represents how far away each of those pixels are from the camera.
I expected the water shader to be quick, but mapping the depth image onto the mesh turned into the hardest part.

Mugen87’s 50-line fragment shader ultimately saved me, especially this snippet:
vec2 screenUV = gl_FragCoord.xy / resolution;

float fragmentLinearEyeDepth = getViewZ( gl_FragCoord.z );
float linearEyeDepth = getViewZ( getDepth( screenUV ) );

float diff = saturate( fragmentLinearEyeDepth - linearEyeDepth );
I researched what saturate() does, and most sources claim that saturate(x) should be the same as clamp(x, 0.0, 1.0). But in testing that was not the case. If anyone can explain how saturate works I’d appreciate understanding better.
With the depth map working, it was comparatively simple to apply noise to the detected edge of the water:
Here’s how the final edge foam calculation looks:
// Edge Foam
float foam = smoothstep(.05, .2, depthDifference);
float noiseSample = texture2D(uNoise, uvCoords * 10.0).x;
foam /= noiseSample;
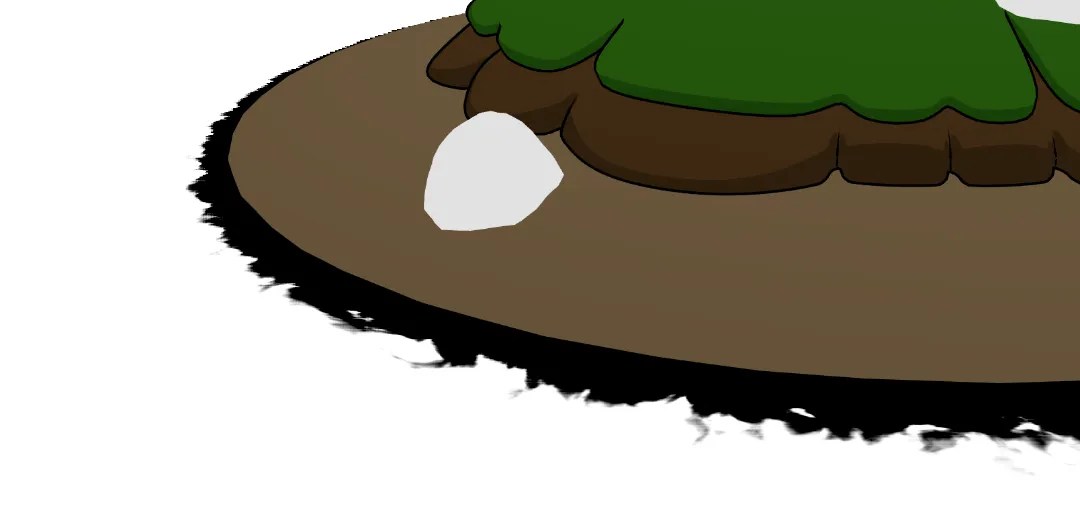
foam = smoothstep(0.5, 0.999, foam);Initially the foam appeared pixelated, so to fix that I increased the dimensions of the depth buffer from 256 up to 1024. Here’s what it looked like before that fix:
The rest of the water shader was simply layering in other simple patterns. Rather than discuss each element, here’s a shader breakdown video:
The resulting shader is robust enough to have arbitrary mesh elements dropped into the water and the edge foam should just work. I think adding some elements that intersect with the water and adding more natural variation to the shape of the sand will improve the scene a lot. The water shader has some limitations since the depth map is generated from the perspective of the camera, but for the case of an island scene I think it will be a convincing effect.
Background
With the water in a decent working state it is time to add something to the background
SkyDome
I used a giant sphere with reversed normals to create the background. This is common practice and with the art style involving a mostly flat background, the giant sphere was the right tool for the job.
export function SkyDome() {

  return (
      <mesh>
        <sphereGeometry args={[1000, 32, 32]} />
        <meshBasicMaterial
          side={THREE.BackSide}
          color={new THREE.Color(0xb0d6f5)}
        />
      </mesh>
  );
}
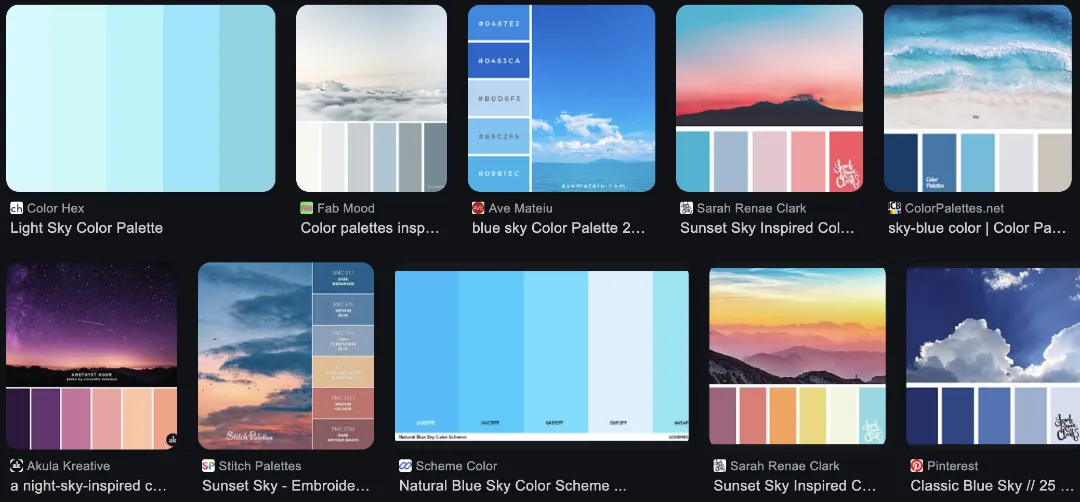
Finally there is something in the background! To make our background look a little better we’ll add a gradient using a custom shader. To pick the colors I just google “sky color palette” and picked some colors I thought looked good.
The shader is just a simple gradient with three color stops.
        <shaderMaterial
          side={THREE.BackSide}
          vertexShader={skyShader.vertexShader}
          fragmentShader={skyShader.fragmentShader}
          uniforms={skyShader.uniforms}
        />
const skyShader = {
uniforms: {
topColor: { value: new THREE.Color(0x0463ca) },
middleColor: { value: new THREE.Color(0x0487e2) },
bottomColor: { value: new THREE.Color(0xb0d6f5) },
},
vertexShader: `
varying vec3 vWorldPosition;
void main() {
vec4 worldPosition = modelMatrix * vec4(position, 1.0);
vWorldPosition = worldPosition.xyz;
gl_Position = projectionMatrix * modelViewMatrix * vec4(position, 1.0);
}
`,
fragmentShader: `
uniform vec3 topColor;
uniform vec3 middleColor;
uniform vec3 bottomColor;
varying vec3 vWorldPosition;
void main() {
float h = normalize(vWorldPosition).y;
float t = max(0.0, h);
vec3 color;
if (t < 0.5) {
color = mix(bottomColor, middleColor, t * 2.0);
} else {
color = mix(middleColor, topColor, (t - 0.5) * 2.0);
}
gl_FragColor = vec4(color, 1.0);
#include <colorspace_fragment>
}
`,
};
Clouds
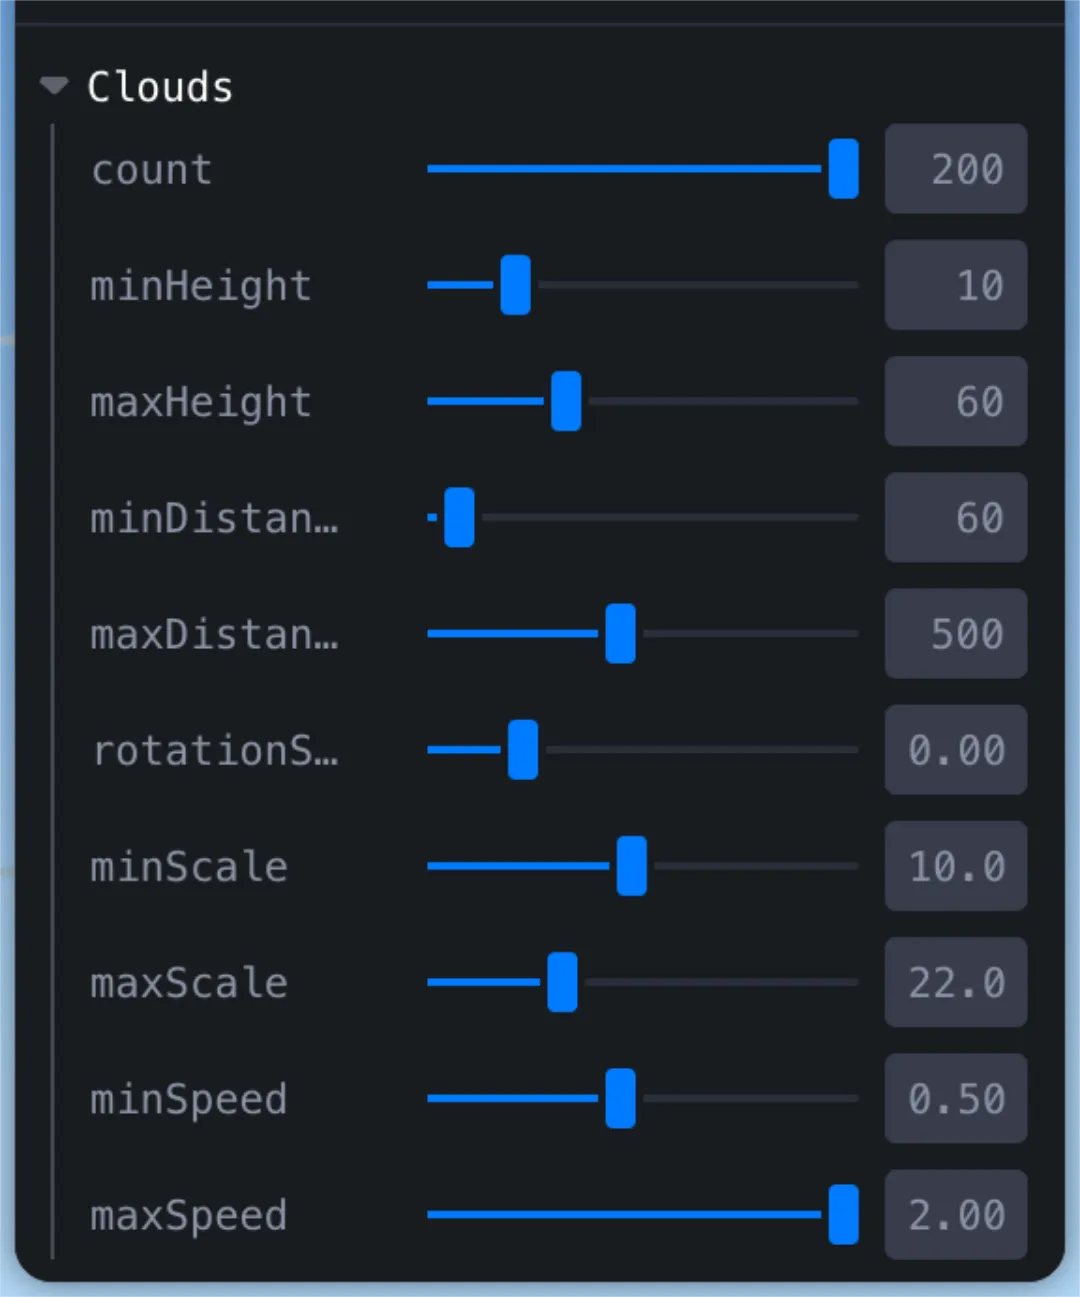
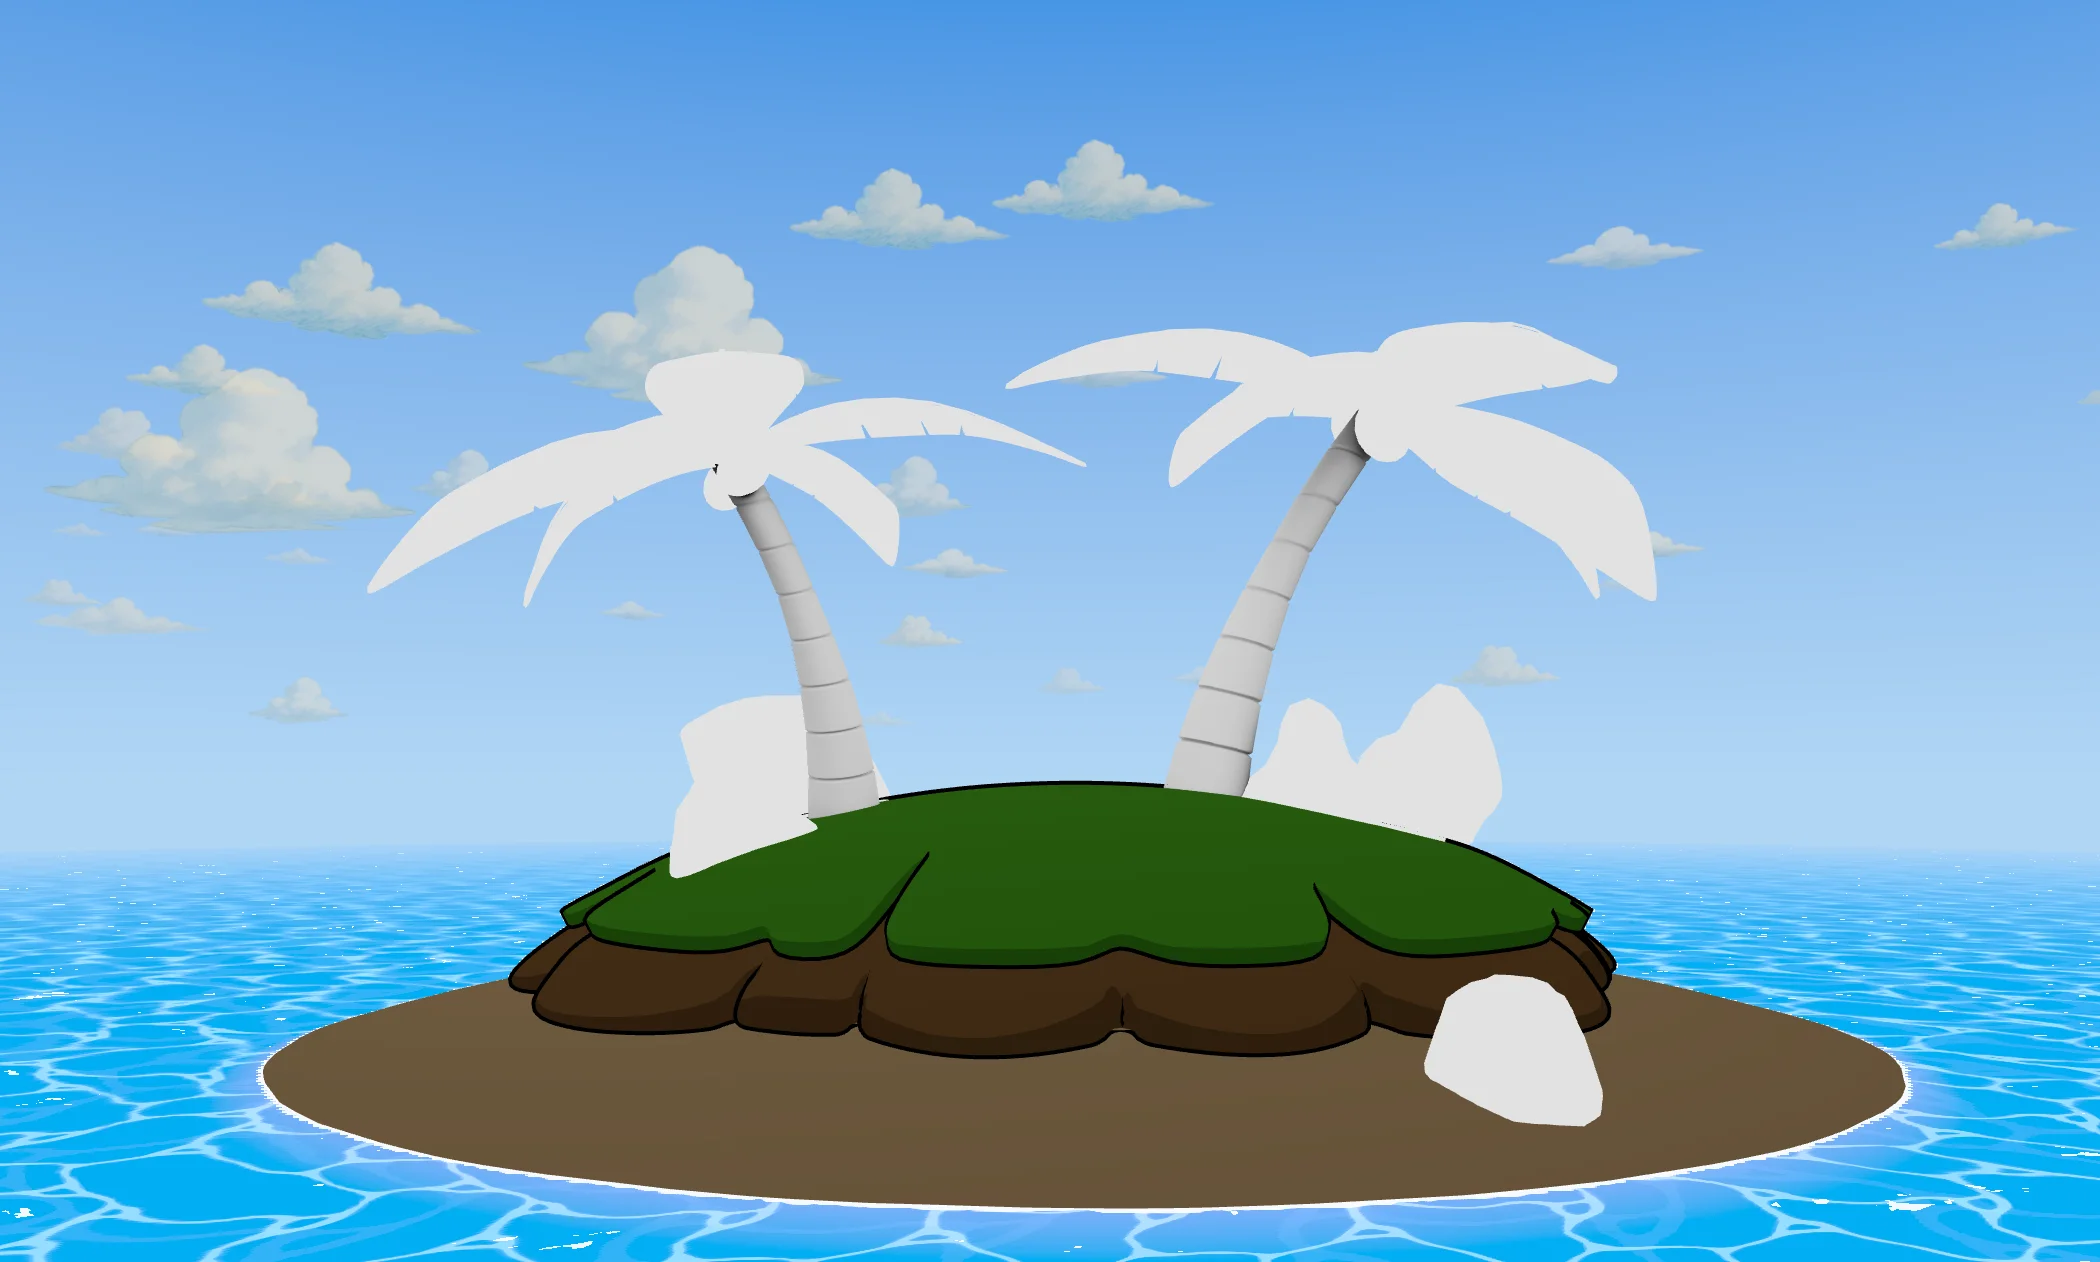
I want to add some clouds to the background as well. I created an array of objects for all of the clouds then iterated over that array to add the actual Cloud components to the scene. Since I’m going for a hand-drawn, rough-edges type of look, I used flat planes with a texture of a cloud on them.
      {clouds.map((props, i) => (
        <Cloud key={i} {...props} />
      ))}
It was extremely helpful to use leva while I was find tuning the parameters of how the clouds should be generated. I wanted the clouds to add a bit life to the scene without becoming distracting, so I added some minimal movement to the clouds and faded out the more distant clouds by lowering the opacity.
Wind Lines
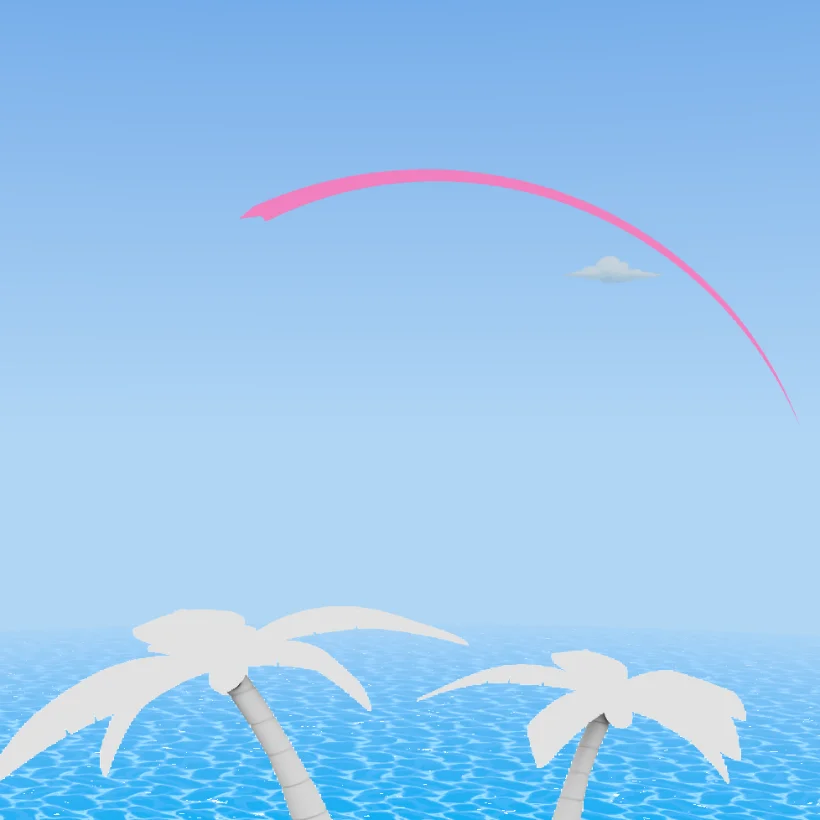
One of the cool elements in Windwaker that I think adds a lot of life to the world are “wind lines” which appear randomly out in the ocean.
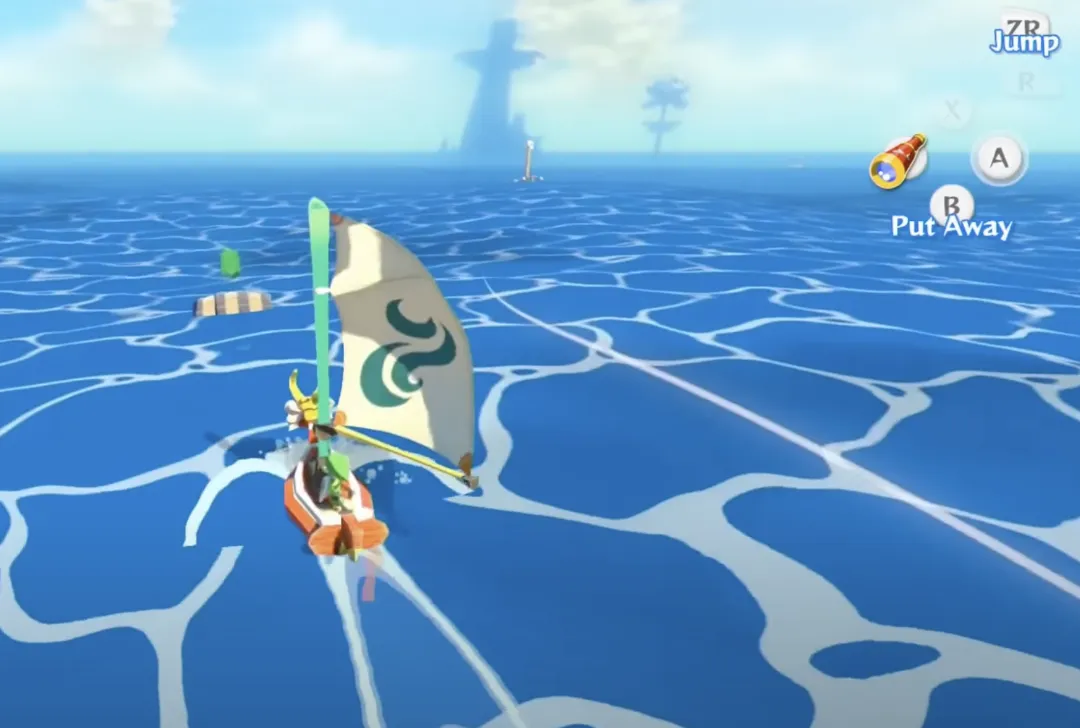
Luckily Trail from @react-three/drei makes this effect super easy. As you’d expect, Trail creates a “trail” following a mesh passed as its child. The first thing we are going to have to adjust is the attenuation. The attenuation function is used to determine the width in each point along the trail. If we take the Trail code straight from the docs we will have an attenuation value which look like this: attenuation={(width) => width} .
That’s going to end up looking like this graph and give us a wind line that is thick at one end and narrow at the other:

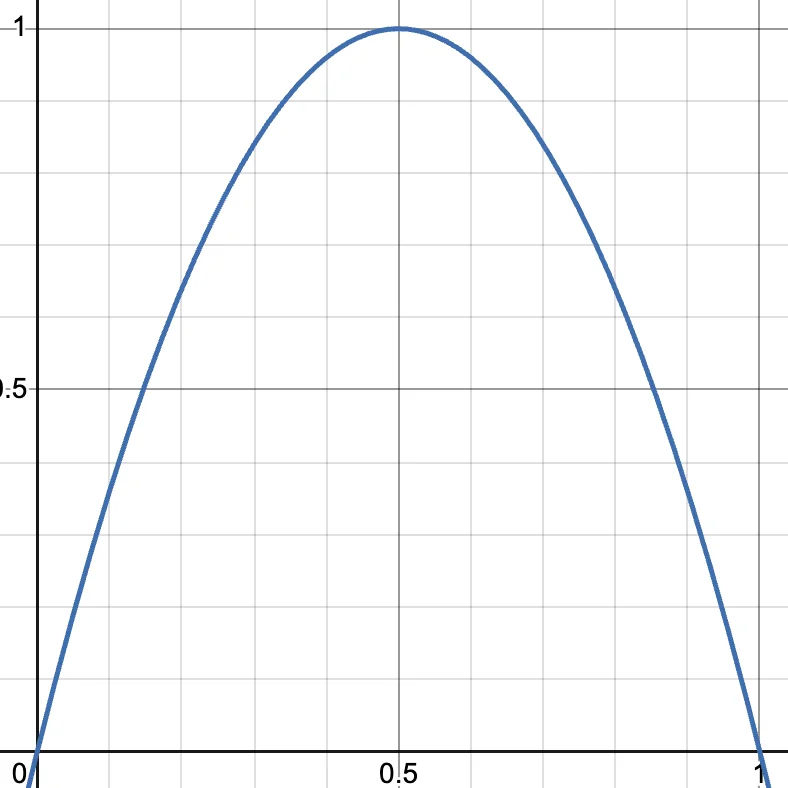
Instead, we want our wind lines to be fat in the middle and narrow at both ends. We can achieve that by using this function instead:
(width) => 4 * width * (1 - width);That will give us a curve like you see below, and results in the ends of our trail being narrow. Sweet!
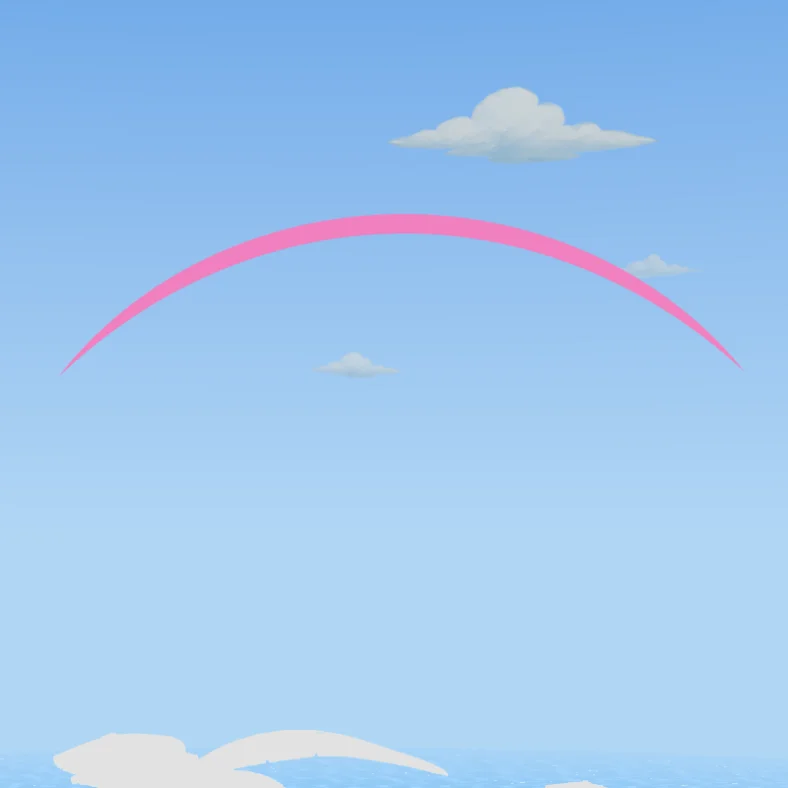
So with just a few lines of code, we are able to achieve a good looking trail:
    <Trail
      width={5} // Width of the trail
      color="hotpink" // Color of the trail
      length={10} // Length of the trail (in seconds)
      decay={1} // How fast the trail fades away
      local={false} // Use world coordinates rather than local
      stride={0.02} // Minimum distance between points
      interval={1} // Number of frames to wait before recording a new point
      attenuation={(width) => 4 * width * (1 - width)} // A function to define the width in each point along it.
    >
      <mesh ref={meshRef} position={[0, 4, 0]}>
        <sphereGeometry args={[0.2, 32, 32]} />
        <meshBasicMaterial color="hotpink" opacity={0.5} transparent />
      </mesh>
    </Trail>
Next we need to set up better logic for how we are controlling the movement of the wind lines and decide when to have them appear. This part proved to be trickier than I expected. I needed the wind lines to look natural so the movement needed to be fairly random. I also wanted each wind line to have a decent chance of being visible to the player to avoid creating wasted ones.
Eventually I ended up creating a spawner box for the wind lines which would be behind the camera and the wind lines get sent in the direction the camera should be facing. This is not actually locked to the camera, but is just a plane in world space. I guess this kind of locks me into limiting how much control the player will have over the camera, but hopefully that won’t limit the experience too much.
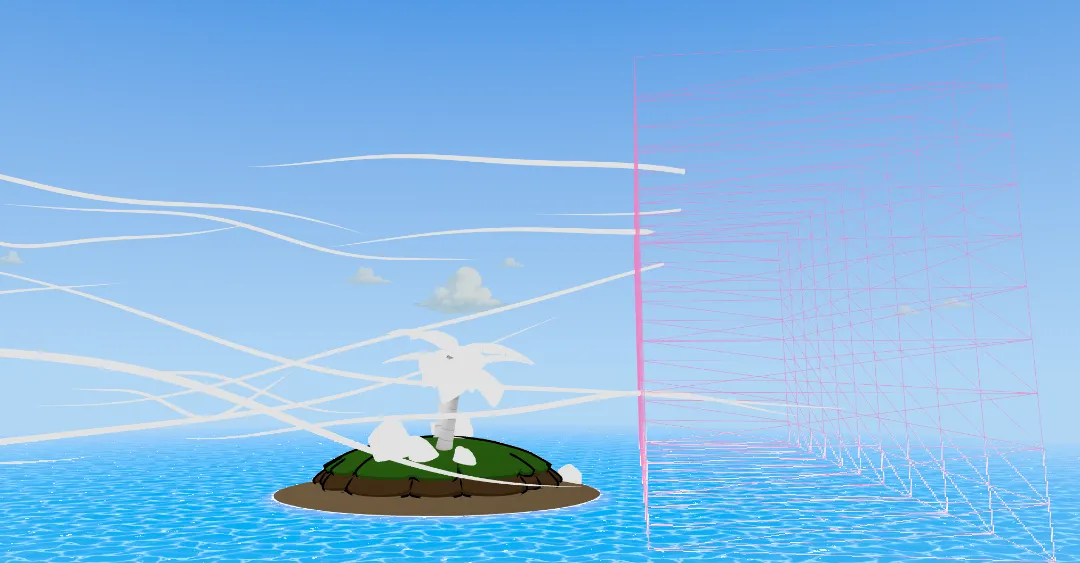
The wind lines move freely within a large invisible bounding box that defines the area they’re allowed to exist in. When a wind line reaches the edge of this box, it despawns and is removed from the scene—except in the vertical (Y) direction. Instead of despawning when they move too high or too low, wind lines are gently steered back toward the allowed height range, creating a smoother, more natural flow.

I noticed a lot of wind lines were getting much too close to the camera, so to reduce that I added an “exclusion zone” where wind lines can’t spawn directly in the center of the spawn area
After a bit of tuning I think the wind lines look pretty decent and add some life to the world.
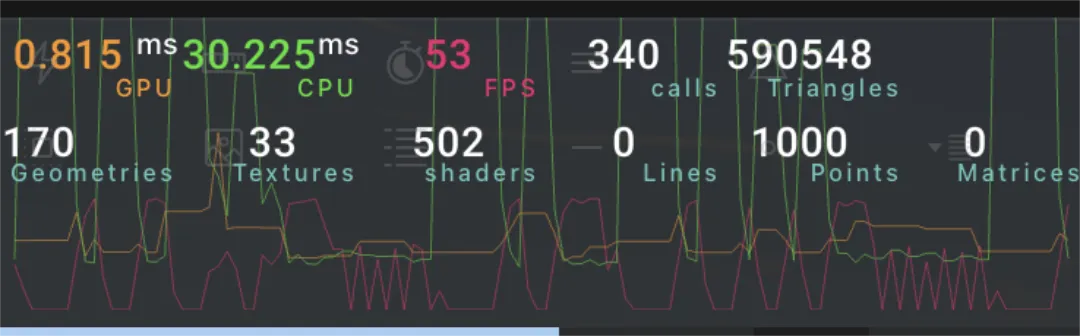
Optimization
I realized the wind lines were causing some performance issues. When the scene is left open for a long time it slowly gets more and more laggy. Not good! I zeroed in on the wind lines as the culprit and turned up the amount of wind lines to understand the problem better. As the scene ran, the number of Geometries and Shaders continued to climb… and climb… and climb. After just a few minutes I was ending up with over 500 geometries and 50,000 shaders with the FPS jumping around 3-15 frames per second!
Clearly we had both materials and geometries which were not being removed from the scene properly. I tried everything I could think of to properly dispose of every element related to the wind lines, but I wasn’t seeing an improvement. I took a look at the source code for Trail from @react-three/drei and noticed that they are using the following code:
    <group>
      {createPortal(<mesh ref={forwardRef} geometry={geo} material={mat} />, scene)}
      <group ref={ref}>{children}</group>
    </group>
I haven’t used createPortal much, but my theory is that somehow the use of portals is interfering with the garbage collection. I decided to fork my own version of the Trail component and fix the issue, but even after removing createPortal I was still getting very poor performance. The next culprit I tackled was react rerenders:
{windLines.map((line) => (
  <WindLine
    key={line.id}
    id={line.id}
    startPosition={line.pos}
    onOutOfBounds={handleOutOfBounds}
    bounds={actualBounds}
  />
))}
With the above code whenever we added a new wind line we were causing every single other wind line to rerender. So imagine we have 50 wind lines and multiple times per second we rerender all of those. That’s a problem, so I rebuilt the WindLines component imperatively. That means we will be skipping out on react three fiber, so we will have to manually manage creation, updates and disposal, which is exactly the goal so we can fix the disposal issue. We will now have classes for the following:
class WindLines {...}
class WindLine {...}
class Trail {...}
Those will be managed by a react component which creates a WindLines object in a useEffect:
function WindLinesController(...){
...
useEffect(() => {
const windLines = new WindLines(...);
windLinesRef.current = windLines;
return () => windLines.dispose();
}, [...]);
return null;
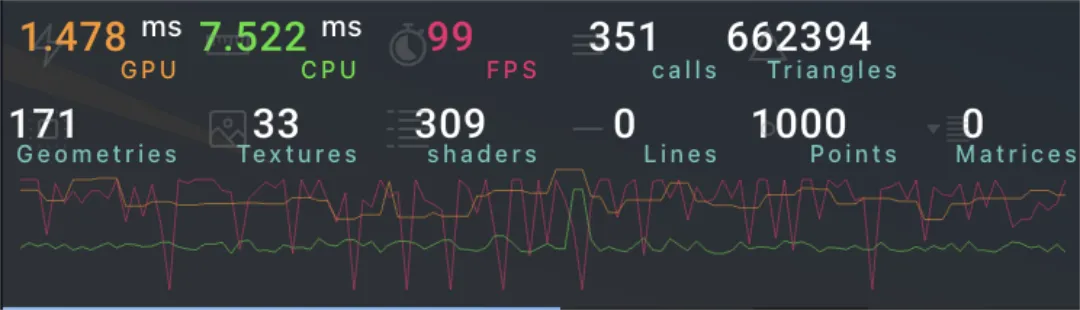
}Moment of truth! Let’s check the performance again after the rewrite:
Staying close to 60 fps but seeing CPU spikes
Things are certainly better since the memory leaks are fixed and we are now close to 60 fps (on my M2 MacBook Pro), but that’s still not great performance and I’m seeing some annoying CPU spikes where sometimes a frame will take much longer than the others around it.
Luckily there is still a lot of low hanging fruit for improving: every time we add a WindLine we do the following:
new Float32Array(...)new MeshLineGeometryImpl()new MeshLineMaterial(...)new THREE.Mesh(...)scene.add(...)
Wow, disgusting! If the performance was fine I would let it be, but in this case we are going to fix it. Every one of those allocations could be done up front when the app first loads and then instead of calling new we just use an existing instance of whatever it is we need. That means we’ll also keep a pool of “dead” Trails (and anchors) and reset their positions and reuse their buffers when we want to make a new WindLine. For the MeshLineMaterial we don’t even need to make one per WindLine- we can just have one MeshLineMaterial which is shared between all of them.
Now the CPUs spikes are basically non existent!
Bugs
Next I thought it would improve the ambience to add some little bugs to the scene. Since THREE.Points is so efficient, we can add as many bugs as we want. Here’s an example with 10 thousand. Since this isn’t going to be a horror game I’ll have to tune that down. 😅
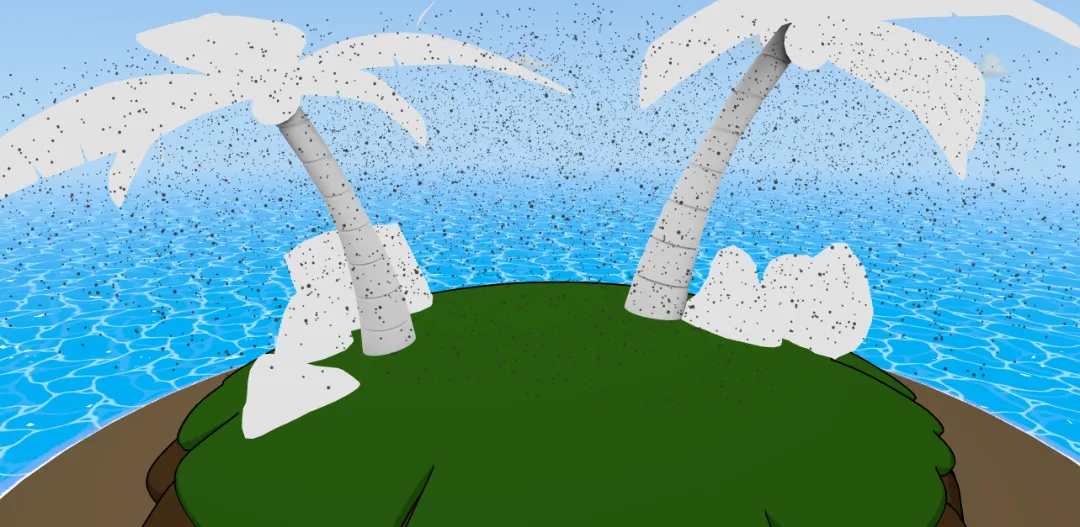
The result is subtle, but I think it’s the really subtle things that add a lot to a scene. I’m hoping the more time a user spends on the page the more interesting things there will be to notice. I want to reward users with lots of tiny details to discover. That’s part of the reason I’ve tried to make the scope of this project as minimal as possible so I’ll have time to deliver on the details and make the polish level as high as possible.
By the time I finished the project, I actually got rid of these. I didn’t think they really fit the style and feeling I was going for. I thought about moving a very small amount to be near a plant or something, but ultimately I don’t think they are a good fit for the project.
Mist
I liked the bugs so much I decided to do almost the same thing, but for creating some nice ocean “mist” particles. I’m not in love with how they look. I may revisit them later, but for now I’ll leave them.
Log
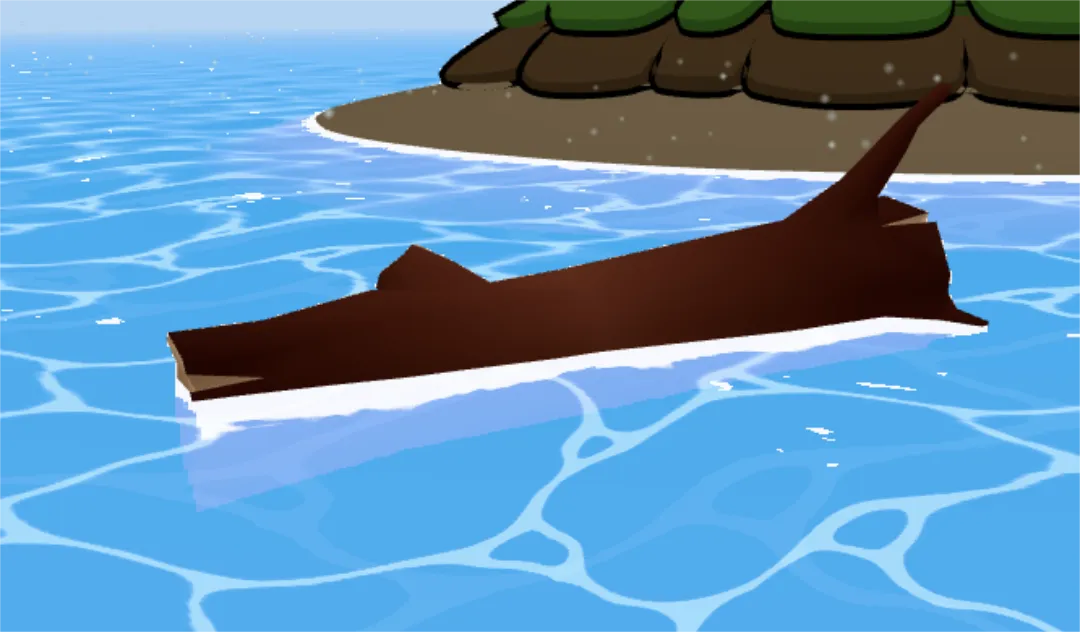
Next I wanted to add some floating driftwood to the scene. I thought it would really make the water feel more believable since currently it is just attached to the island and it’s not really clear how “fake” the foam edge effect is. There is also not a super clear point of reference for if the water is really moving up and down or if it is an illusion somehow, so I hoped the log would help ground that a little bit more.
For the motion, I wanted it to look natural, like the log is reacting to the water rather than being perfectly synced to it. At first, I had the log just follow the water level with a slight delay:
const targetWaterLevel = baseY + getWaterLevelAtOffset(-0.2) * 1.5That worked okay, but it looked a bit stiff. So I added some buoyancy physics—calculating a force based on how far the log is submerged:
const submersionDepth = targetWaterLevel - currentY;
const buoyancyForce = submersionDepth * 2.0;
Then I layered in gravity and damping:
const gravityForce = -0.15;
const dampingForce = -velocityRef.current * 0.6;
const netForce = buoyancyForce + gravityForce + dampingForce;
This gave the log a nice floating behavior with a bit of physical weight behind it.
Rotation was trickier. I started with just a Math.sin wave, but it looked too uniform and fake. So I experimented with layering multiple Math.sin and Math.cos functions at different frequencies to get a more irregular and natural look:
const zRotation =
  Math.sin(time * 0.4) * 0.3 +
  Math.sin(time * 0.17) * 0.15 +
  Math.sin(time * 1.5) * 0.05;

const xRotation =
  Math.sin(time * 0.7) * 0.12 +
  Math.sin(time * 0.23) * 0.08 +
  Math.cos(time * 2.1) * 0.03;
This made the log feel like it was reacting to complex, overlapping wave patterns instead of just rocking back and forth on a timer. Even though the water surface is currently always flat, the motion of the log almost makes the water look more like it has some waves. The log is another subtle detail—but I think it adds a lot to the vibe of the scene and helps tie the world together just a little bit more and makes it feel more alive, though I still think there’s a lot more to do to make the scene feel even more believable.
Wiggle-able Palm Trees
At this point in the project, I felt like the biggest thing the project is missing (besides actual textures 😅) was interactivity. I’d recently seen this amazing Three.js library called wiggle by @KMkota0 and have been hoping for an excuse to use it.
The wiggle library uses spring physics to animate rigged objects, creating gentle, lifelike motions without complex keyframe animations. It’s a performance-friendly way to make models feel organic and dynamic.
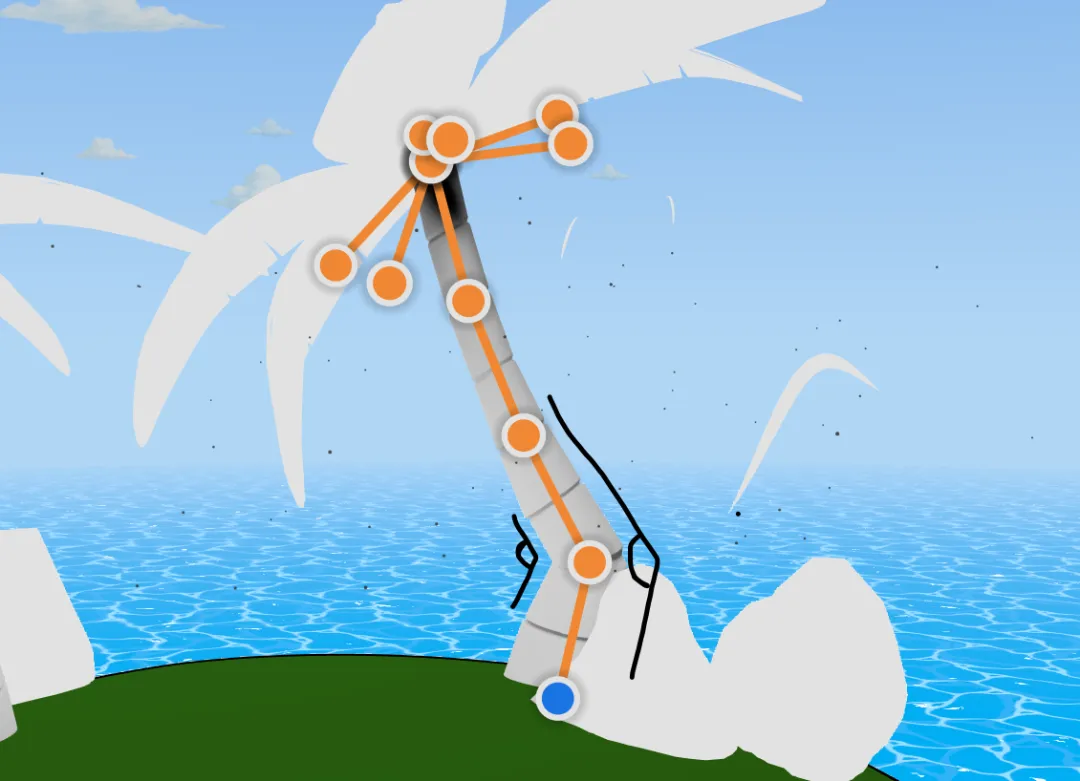
Integrating wiggle was trickier than I expected. All the examples I found assumed a single root bone that the user moves directly. My palm trees, however, being trees, were literally rooted in place; I needed the base to stay fixed, but still animate the upper portion.
My solution was a bit of a hack: keep the real root bone static at the ground, and instead manually animate the next bone up in the chain within useFrame. This way, I could layer in wind-driven motion and user-driven interaction simultaneously.
useFrame(({ clock }) => {
  const time = clock.getElapsedTime() + timeOffset.current.phase;
  if (controlBoneRef.current) {
        controlBoneRef.current.rotation.set(
          windOffsetRef.current.x + grabHandleOffsetRef.current.x,
          windOffsetRef.current.y + grabHandleOffsetRef.current.y,
          windOffsetRef.current.z + grabHandleOffsetRef.current.z
        );
  }
});
I tested out quite a few values for the stiffness and damping of the bones to try to achieve a believable sway behavior. For the trunk, I went with a stiffer setup (stiffness: 500, damping: 25) to create a stable but flexible motion. Leaves needed more delicate behavior (stiffness: 150, damping: 100), allowing them to flutter more in the wind and be flung wildly by the user.
Wind motion
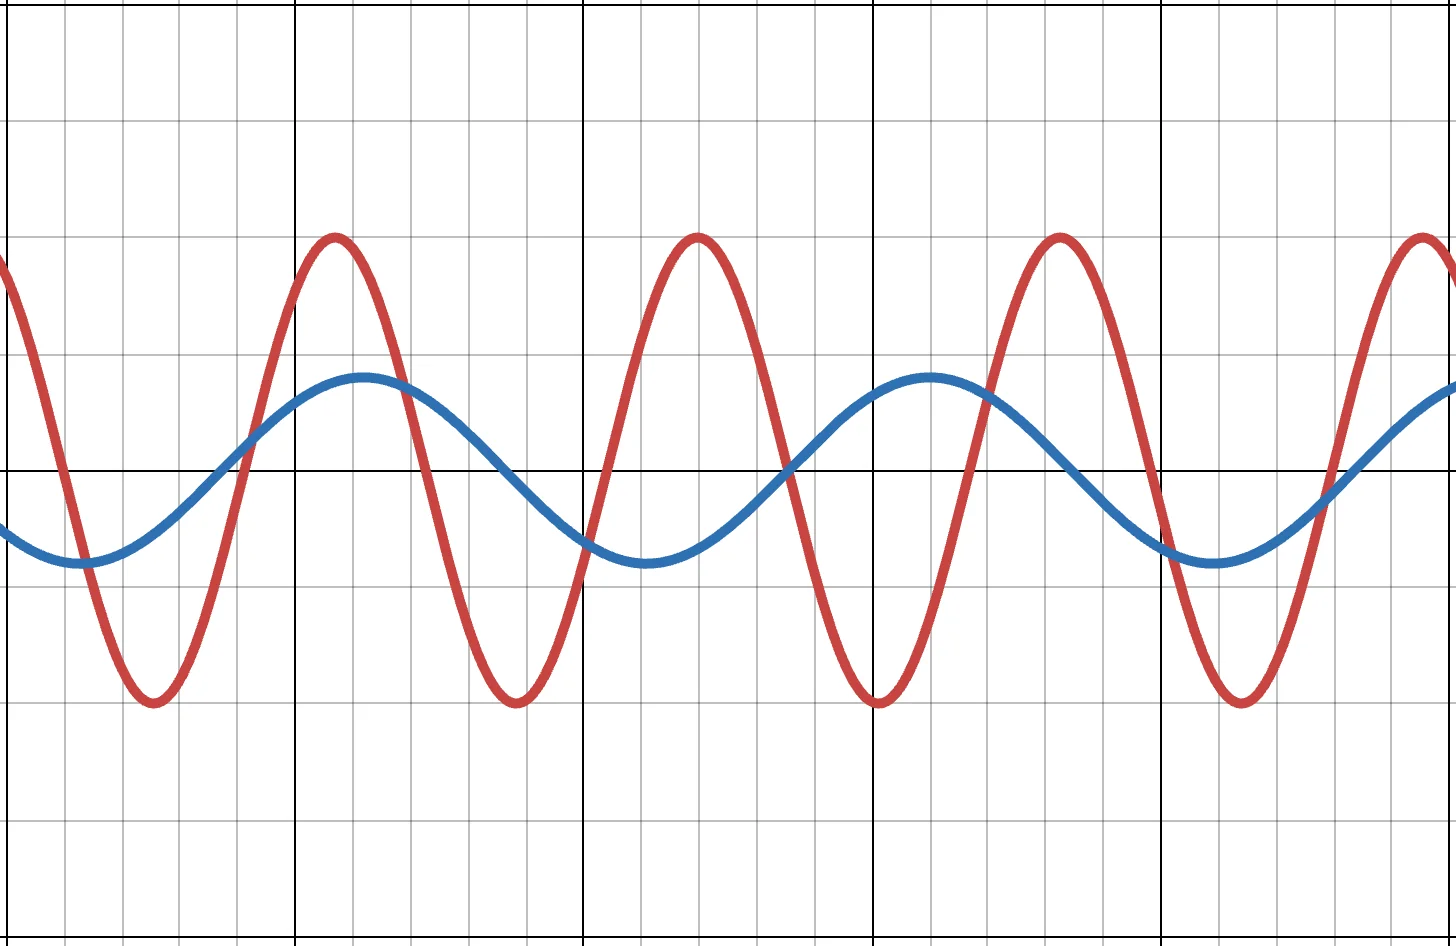
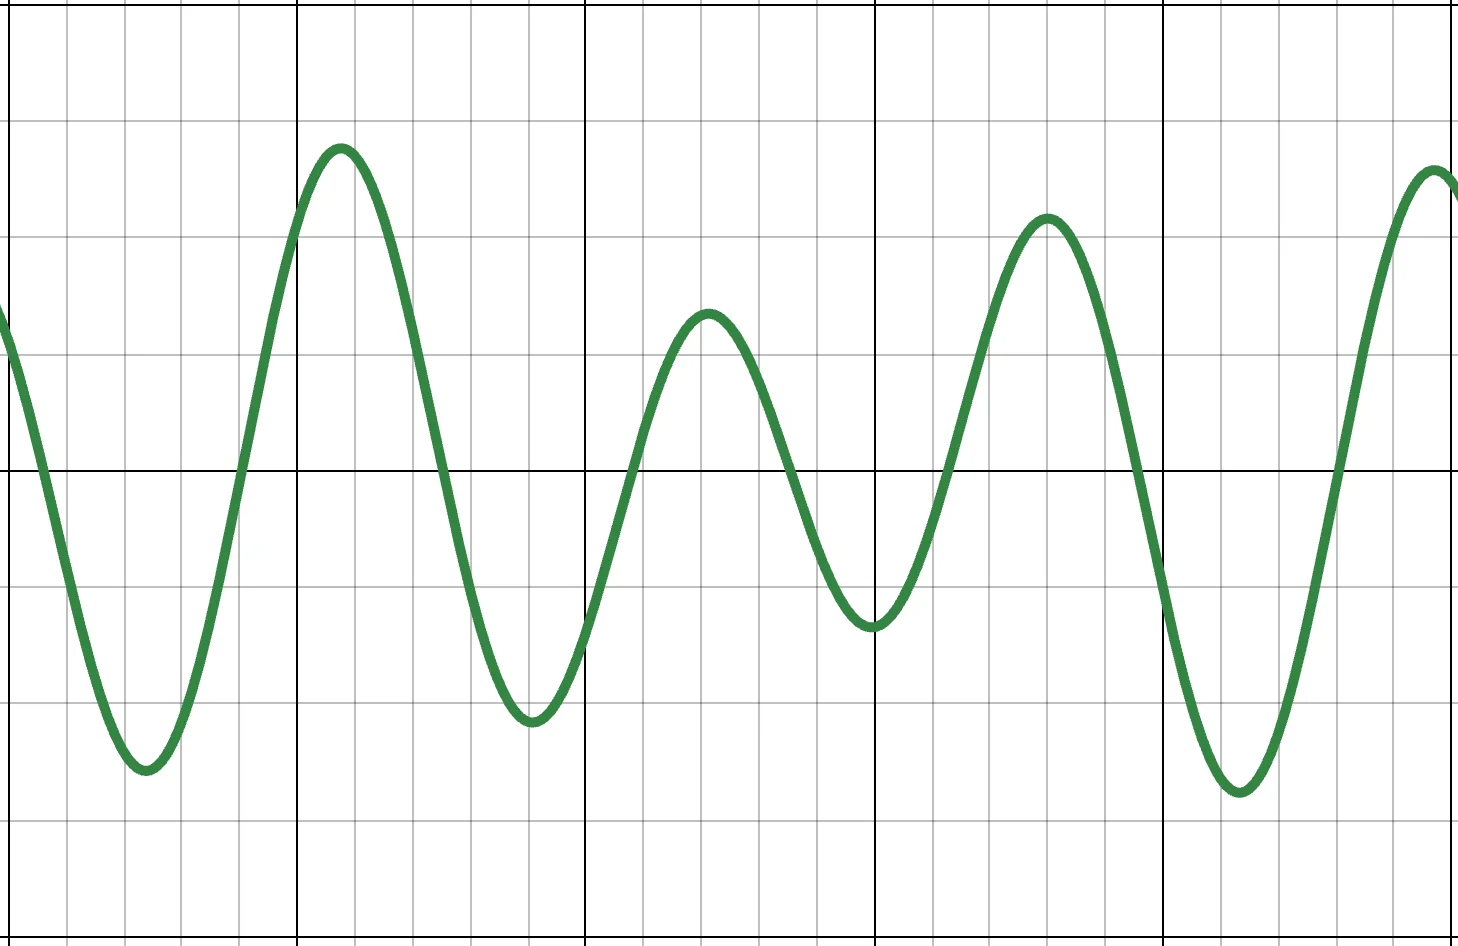
Initially, the wind motion felt robotic since I had just one sine function driving rotation per axis. To fix this, I went back to the multiple sine waves trick. Suddenly, the palm trees came alive, gently swaying in unpredictable, organic ways.
Here’s how the layered motion looked in code:
windOffsetRef.current.x =
  Math.sin(time * 0.5 + offset.x) * baseAmplitude +
  Math.sin(time * 0.32 + offset.x * 0.7) * baseAmplitude * 0.4;
Those two sine waves look cyclical, regular, and predictable individually (left image), but layered together (right image) they make a much more organic and interesting pattern:
Unique Trees Instances
To avoid repetitive motion when multiple trees were placed together, each instance got random time offsets on initialization:
const timeOffset = useRef({
  x: Math.random() * Math.PI * 2,
  y: Math.random() * Math.PI * 2,
  z: Math.random() * Math.PI * 2,
  phase: Math.random() * Math.PI * 2,
});
This subtle randomness means no two trees sway exactly alike, greatly enhancing realism.
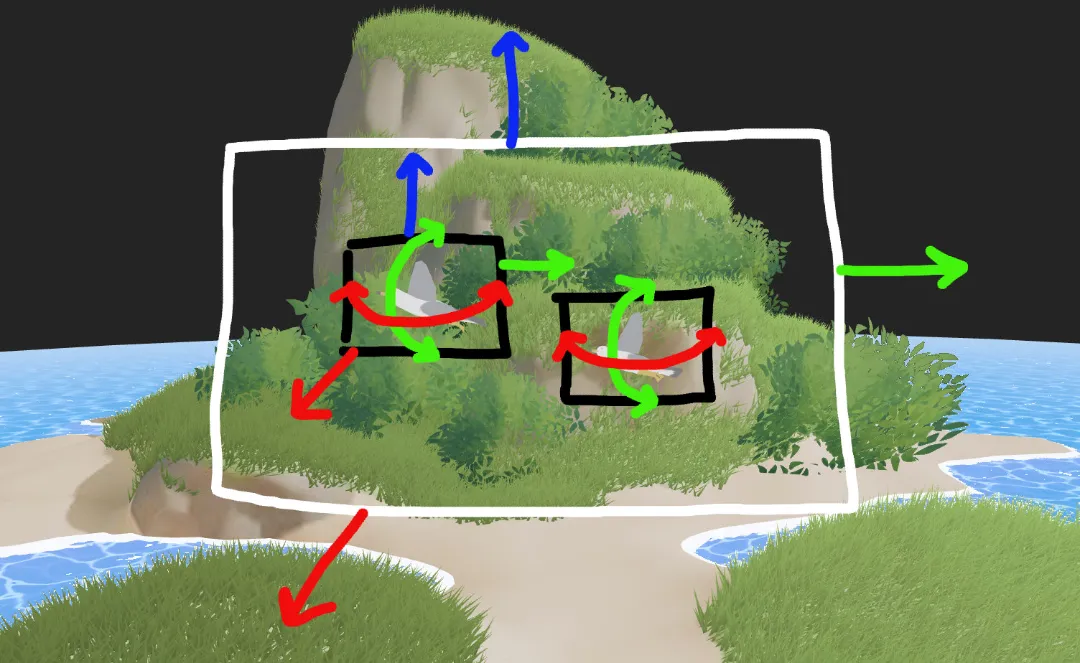
Interactivity
Finally, to make the user interaction possible, I added an invisible “grab handle” at the top of the tree that users can drag to directly influence the control bone. I’m hoping this is a satisfying interaction for users and that it feels fun and interesting to use. There a few drawbacks to the tree that I’m still aware of.
Some users will not even know that they can shake the tree. The cursor changes to a grab hand when you mouse over the grabbable area, but this is pretty subtle and won’t help mobile users at all. We may need to have some sort of ui element which suggests that users shake the tree if they don’t figure it out on their own.
Since the trees entire motion extends from the a bone near the bottom of the trunk, you can see quite a sharp bend near that bone sometimes
The tree has a very limited range of motion. I set up the grab handle to only move the tree based on the side-to-side movement of the cursor. So if a user tries to shake the tree up and down nothing will happen.
The tree does not exactly follow the position of the cursor. This might hurt the experience of interacting with the tree, but for now I’ll leave it as is and see how users respond once they try it out.
Since the water shader uses a depth buffer for rendering, if you move the tree quickly and there are ocean pixels near the tree some users may notice that the tree affects the ocean shader when it should not. If this turns out to be an annoyance I can always go back and make sure palm trees are excluded from the depth buffer.
Overall I’m excited about the result. My hope is that adding a few interactions like this will feel like the user finding little pieces of candy scattered around the scene. Hopefully the effect still looks good when the tree has actual materials 🤣.
Crab 🦀
“Why hand‑key an animation when you can teach the legs to think for themselves?”
I’ve always wanted to create a programmatic walking animation. A robot seemed like the best candidate for the idea, but I realized a crab would work as well which fits great with the island theme!
This video distilled the walking concept down to the atomic steps. Here’s the gist:
- Control the legs using Inverse Kinematics (IK)
// 0 'UpperLegBone'
// 1 'LowerLegBone'
// 2 'FootBone'
// 3 'ControlBone'
const rightIks = [
  {
    target: 3,
    effector: 2,
    links: [
      {
        // controls bending between the upper leg and lower leg
        index: 1,
        rotationMin: new THREE.Vector3(-0.1, -0.3, -0.2),
        rotationMax: new THREE.Vector3(0.1, 0.3, 2.3),
      },
      {
        // controls bending between the body and the upper leg
        index: 0,
        rotationMin: new THREE.Vector3(-0.4, -0.3, 0.9),
        rotationMax: new THREE.Vector3(0.4, 0.3, 2.3),
      },
    ],
  },
];
...
ikSolver.current = new CCDIKSolver(
  legMesh.current,
  props.side === "left" ? leftIks : rightIks,
);
Stick the feet to the ground
Raycast a desired foot position
const intersects = raycaster.intersectObjects(
      state.scene.children,
      true,
    );
    // Check if we hit anything
    if (intersects.length > 0) {
      footPosition.y = intersects[0].point.y;
}- If the foot is far from the desired position, lift the leg and move it to the target
  private calculateStepPosition(): void {
    // interpolation between start and end positions
    this.currentStepPosition.lerpVectors(
      this.startPosition,
      this.endPosition,
      this.stepProgress,
    );

    // add vertical lift using a sine curve (highest in the middle of the step)
    const liftFactor = Math.sin(Math.PI * this.stepProgress);
    this.currentStepPosition.y += this.maxLiftHeight * liftFactor;
}- Put legs into two groups and only let one group move at a time
if (areAllActiveLegsIdle && t - lastMove > 0.2) {
  activeGroup = activeGroup === A ? B : A;
}
Position the body based on the feet
Tilt the body based on the feet
X‑rotation (pitch) = front tripod height − back tripod height

Z‑rotation (roll) = left feet − right feet
That’s the super simplified version of the crab walk. After that I also added a few other details. When the crab is moving it lifts its body a bit higher and when it stops it lowers its body and does a subtle breathing animation. The pupils of the crab also follow the cursor and the crab blinks every few seconds.
To tie the crab into the experience for the user, I used three-pathfinding and created a navmesh in blender to allow the crab to walk to where the user clicks on the island.
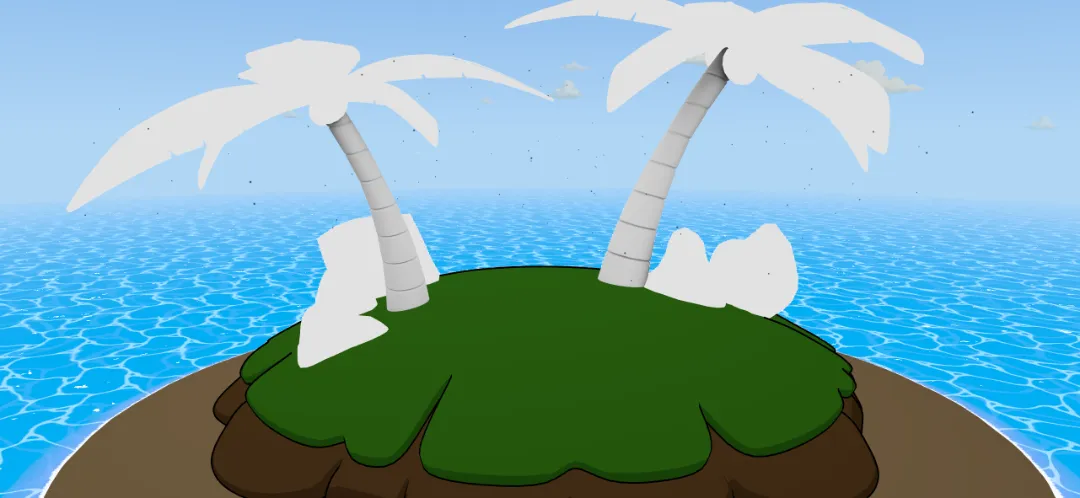
The Island
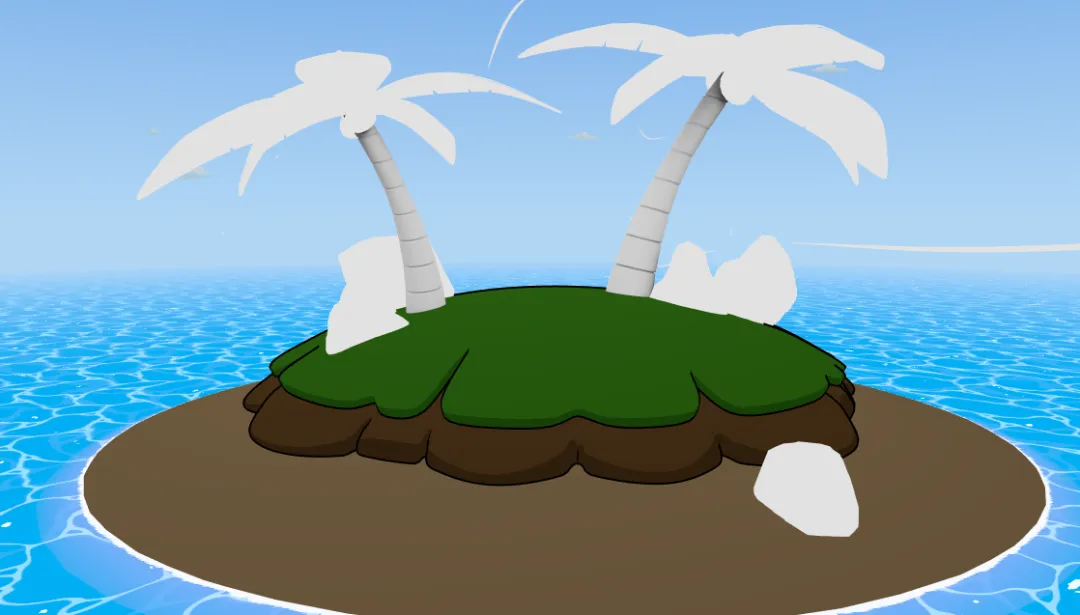
The next step was to improve the island. The island itself is arguably the core element of the project so it needs to look polished and well crafted.
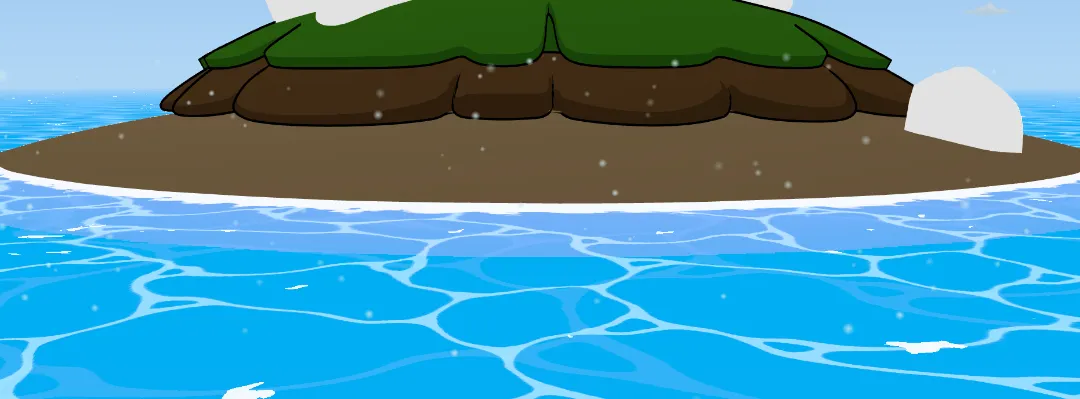
The sand height now has more logical high and low points which look good at various water heights
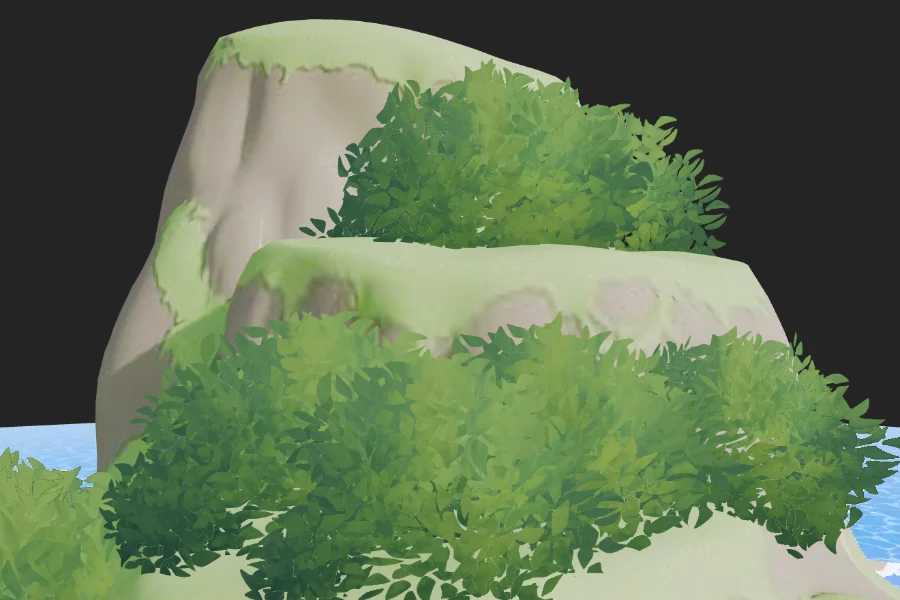
Bushes
The grass on the island looked like a plastic cake, so that needed to be fixed. In some of my reference images the grass on the mountain looked so fluffy. You can tell the foliage has a lot of volume to it.
I thought a lot about this issue. I considered texture painting in some more details on the green parts, and while I think that would help a little, I think that’s more of a bandage than a true fix. I decided the best way to add fluffiness was to add something fluffy: bushes. I researched a bunch of different methods for creating bushes but the approach I went with was the one Bruno Simon used in this video. Here’s the abbreviated version:
- put a bunch of random planes
- change the planes normals to face directly outward
- use a matcap material
- add some wind displacement
The idea to make the normals of each plane face outward is super interesting.
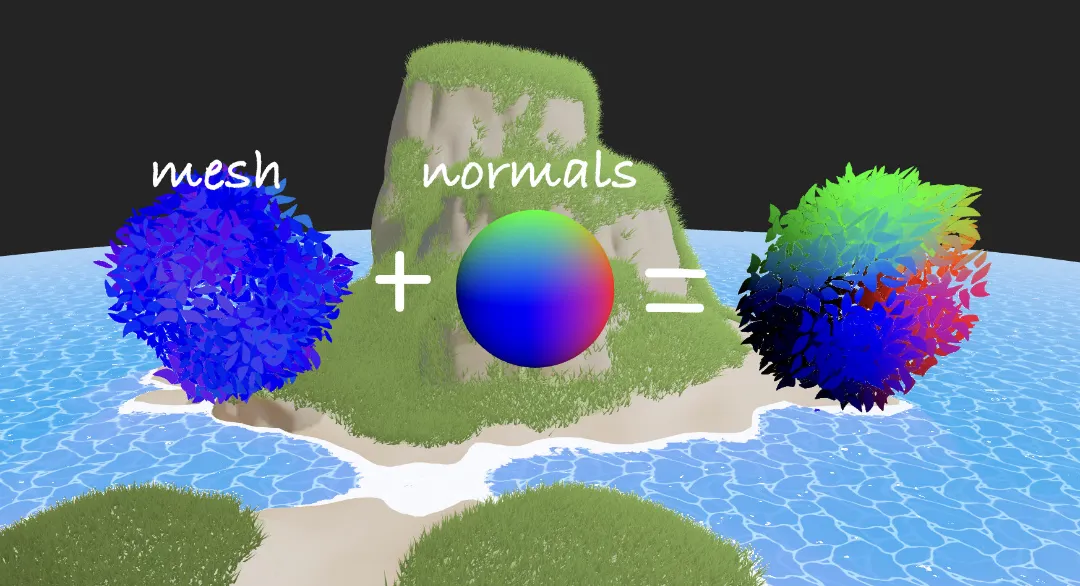
I also used a textured image for the matcap texture which gave the bushes an interesting style.

Grass
I wanted to use the drei Sampler for the grass, but the examples in drei’s docs were broken. Luckily I stumbled across this example which worked as a great starting point:
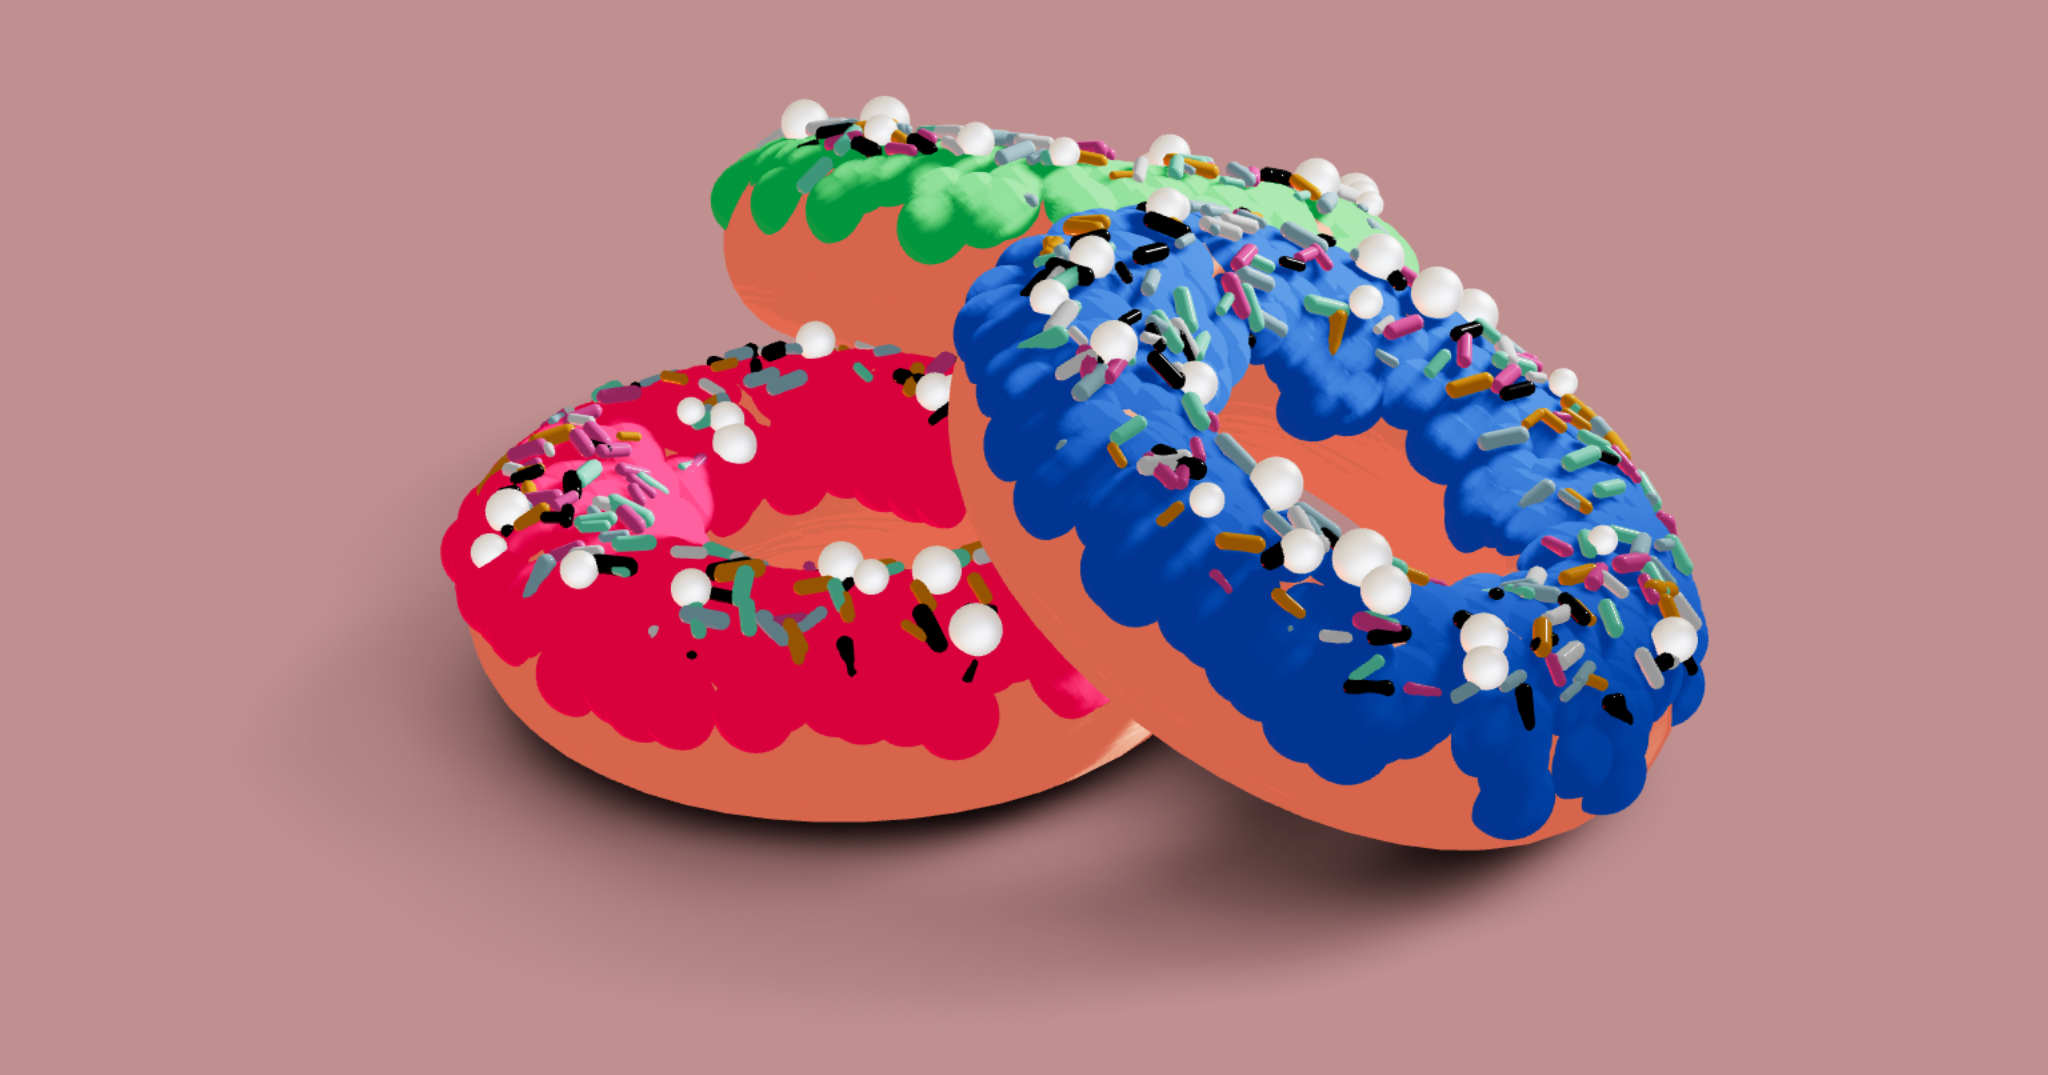
<>
      <mesh ref={mesh} rotation={[Math.PI / 2, 0, 0]} castShadow receiveShadow>
        <primitive object={torusGeometry}>
          <ComputedAttribute name="upness" compute={computeUpness} />
        </primitive>
        <meshToonMaterial color="#ffc090" />
      </mesh>
      <Sampler
        position={[0, -0.01, 0]}
        rotation={[Math.PI / 2, 0, 0]}
        mesh={mesh}
        count={blades}
        weight="upness"
        transform={transformGlassBlades}
      >
        <instancedMesh
          frustumCulled={false}
          renderOrder={-1000}
          receiveShadow
          castShadow
          args={[bladeGeometry, grassMaterial, blades]}
        ></instancedMesh>
      </Sampler>
    </>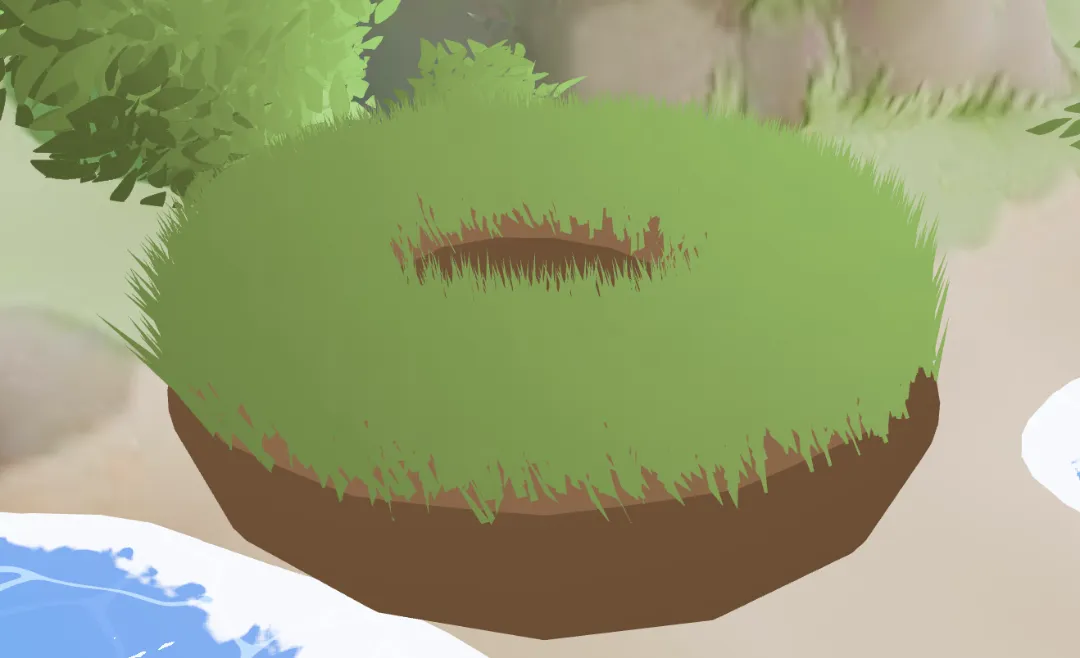
The blades of grass are very simple triangles:
const geo = new THREE.BufferGeometry();

const vertices = new Float32Array([
  -0.02, 0, 0, // bottom-left
  0.02, 0, 0, // bottom-right
  0, bladeHeight, 0, // top-center
]);
geo.setAttribute("position", new THREE.BufferAttribute(vertices, 3));

const uvs = new Float32Array([0, 0, 1, 0, 0.5, 1]);
geo.setAttribute("uv", new THREE.BufferAttribute(uvs, 2));

geo.computeVertexNormals();

return geo;
I used a matcap similarly to the bushes, but there is very little color contrast in the grass, so to make the grass a bit more interesting and readable I darkened the bottom of the grass blades like this:
float darkeningFactor = 0.4 + 0.6 * vHeight; // 0.4 at bottom, 1.0 at top
vec3 darkened = matcapColor.rgb * darkeningFactor;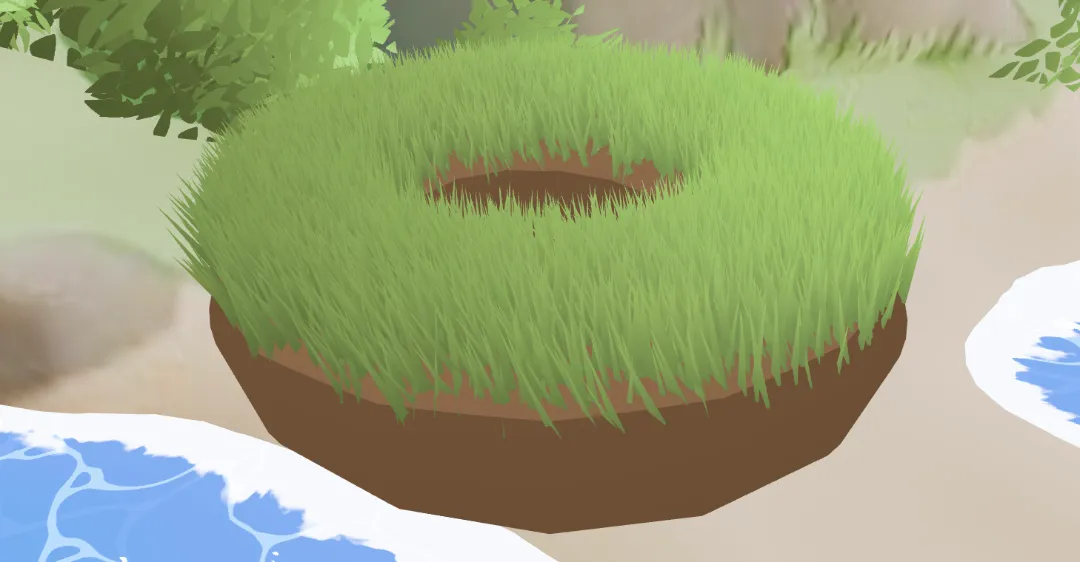
That’s already a huge improvement! But if we look at the grass from the side the blades disappear and it looks terrible:
Bruno Simon suggested fixing that issue by using billboarding. We first calculate the angle between the center of the blade and the camera, and then we rotate the vertices around the center of the blade.
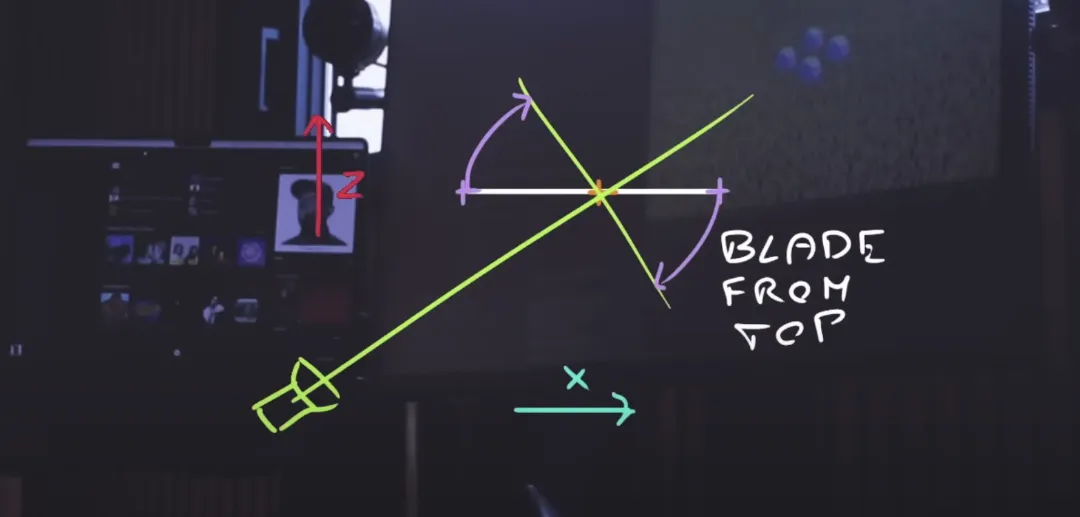
There is still another issue we need to fix: when looking at the blades from above, the grass can still disappear. We fix this by ~~~
vec3 tiltDir = normalize(vec3(toCam.x, 0.0, toCam.z));
float tiltAmt = uTiltStrength * h;
transformed.x -= tiltDir.x * tiltAmt;
transformed.z -= tiltDir.z * tiltAmt;Next is the fun part: making the grass blow in the wind. I started with some basic noise displacement applied to the blades, but quickly realized this approach was not very visually appealing since there wasn’t much of a pattern to the wind. This looked like chaotic random wiggling.
Instead, imagine a large transparent sheet of cloth (the wind) being dragged slowly across a field of grass. The shape of the cloth causes different sections of grass to bend differently. As the cloth moves, the wind pattern moves with it. Achieving that effect turned out to pretty simple as we can use the center.xz projected into the noise texture and drift over time:
    vec2 worldUv = center.xz * noiseScale + uWindDirection * uTime * noiseSpeed;
    float windDisplacement = texture2D(noiseTexture, worldUv).r;
We apply the windDisplacement only at the top and we are good to go:
    float windAmt = windDisplacement * uWindStrength * h;
    transformed.x += uWindDirection.x * windAmt;
transformed.z += uWindDirection.y * windAmt;Next we need to apply the grass to the island mesh instead of the Codepen donut.
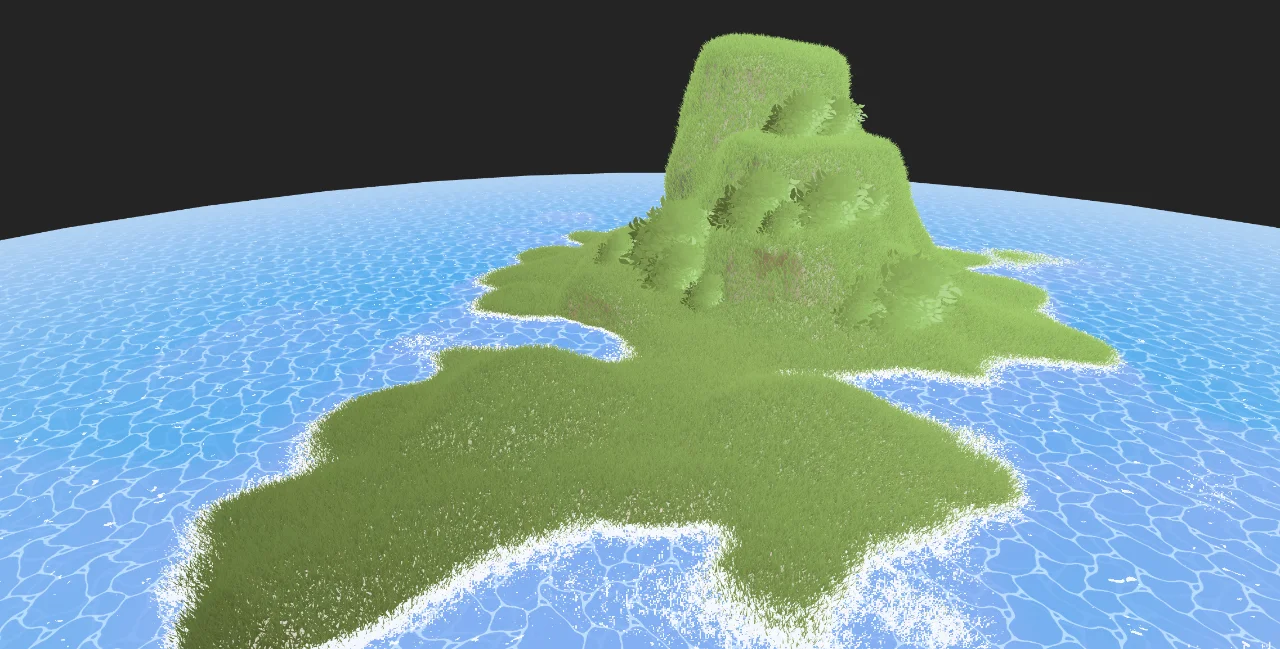
We can apply the grass to only the green areas by calculating a grassWeight attribute from the pixel colors and telling the drei Sampler to use that. There are still a lot of ways we could improve the grass further, but this result is sufficient for now:
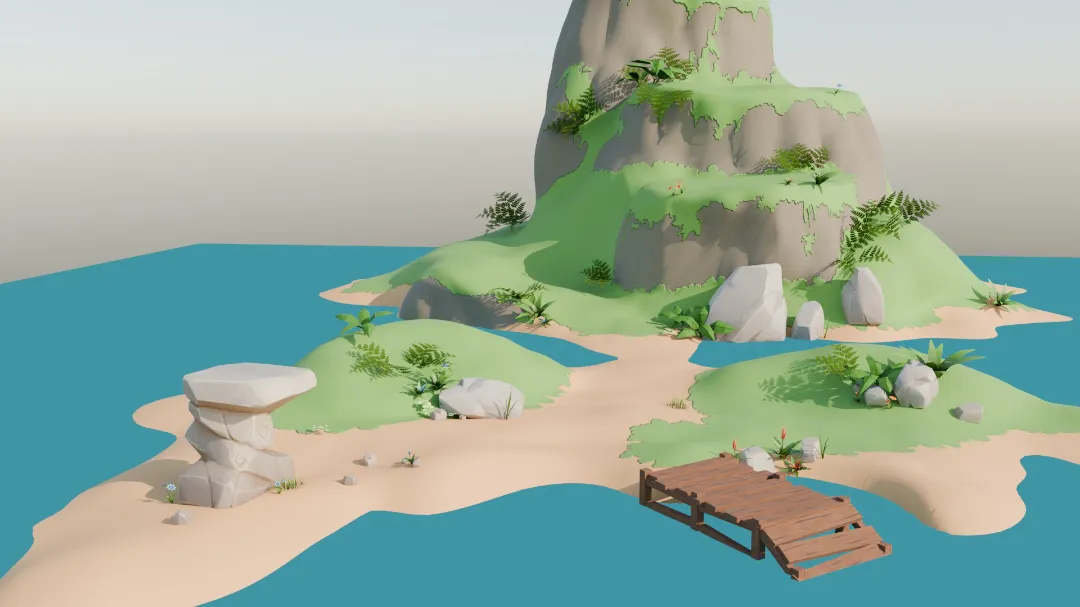
Decorations
To spruce things up I added some rocks, plants, and flowers scattered around the island. This gives the user a lot more small things to notice if you look close, and overall makes the scene feel more detailed.
Drag the sliders below to see the transformation from “Ugly Rocks” -> “Nice Rocks” -> “Plants”


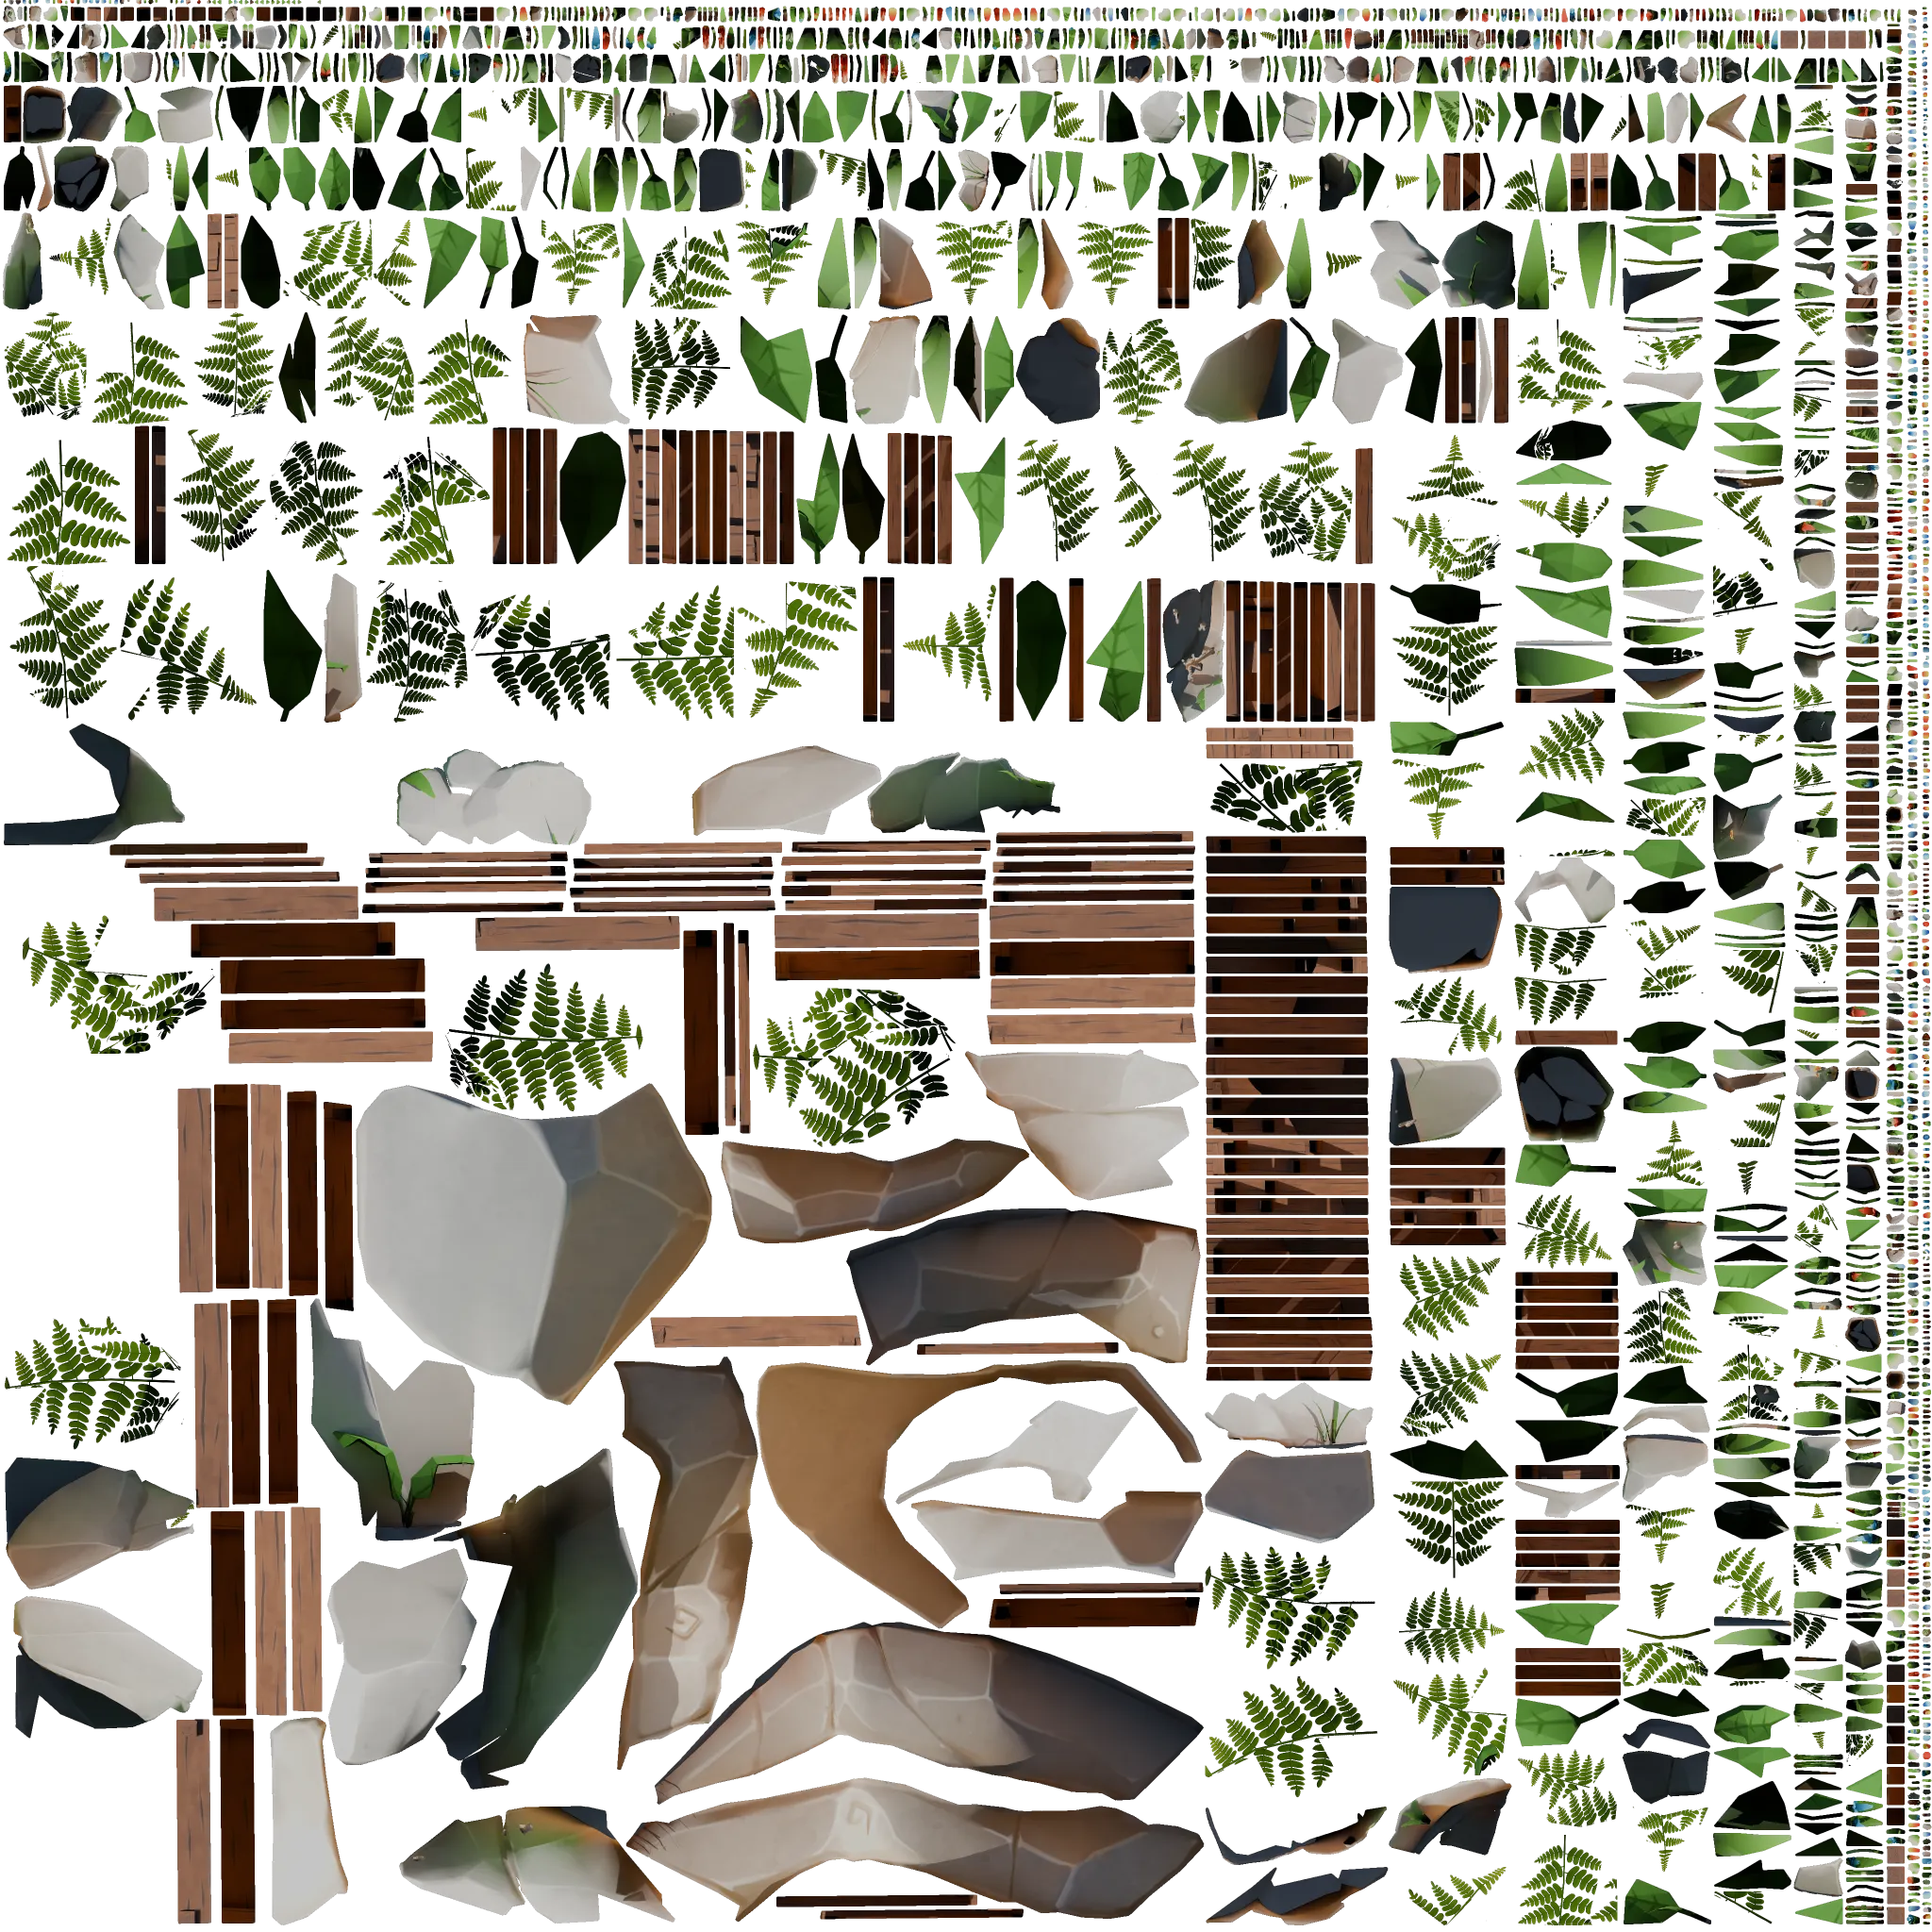
I packed all of the decorations into a single 2k texture atlas to save on draw calls. With the texture at 806kb and the .glb at 232kb, the decorations are sitting around 1mb. Considering there were 101 individual decoration objects I think that’s pretty good. The UV unwrapping and packing could be optimized even more, but for the sake of development efficiency the result is sufficient.
Butterflies

The simplest way to add butterflies would probably be to download one or even create and animate one in blender. But I couldn’t bring myself to force the user to download an entire extra .glb when a butterfly is really just two planes flapping around. Luckily it was pretty simple to create two planes in code:
<mesh geometry={wingGeo} position={[0.15, 0, 0]} />
<mesh geometry={wingGeo} position={[-0.15, 0, 0]} />
To save a bit of texture space, the butterfly texture includes only on half of the butterfly. One plane directly used this texture, while the other plane received a flipped version:
const leftWingTexture = baseTex;
const rightWingTexture = baseTex.clone();
rightWingTexture.repeat.x = -1;
rightWingTexture.offset.x = 1;
rightWingTexture.needsUpdate = true;
I decided to use a custom shader to control the flapping of the wings. This moved the wing calculation to the GPU, saving us a bit of CPU time. The scene won’t have thousands of butterflies, but I thought it would be fun to try that way.
float angle = (sin(time * speed) * amplitude + restAngle) * flipDirection;
float pivotX = 0.15;
float distFromPivot = position.x - pivotX;
pos.x = pivotX + cos(angle) * distFromPivot;
pos.z = sin(angle) * distFromPivot;
I wanted to stick to my vertex shader approach I used with the wings to control the overall movement of the butterfly. But it was easier getting it to work by manipulating a group inside of useFrame, so the CPU isn’t getting a break after all. I added a bit of pseudo-random motion using sine and cosine functions to control a wandering force:
const modulatedForce = new THREE.Vector3(
  (Math.sin(t * 2) * 3 + Math.cos(t * 0.3) * 8),
  (Math.sin(t * 6) + Math.cos(t * 0.8) * 2),
  (Math.sin(t * 1.2) * 4 + Math.cos(t * 0.2) * 6),
).multiplyScalar(randomForce * delta);
Additionally, each butterfly tries to gently steer itself back toward a central “home” area to prevent them from drifting away indefinitely:
const toHome = home.clone().sub(position.current);
if (toHome.length() > minDistance) {
  velocity.current.add(toHome.normalize().multiplyScalar(steerFactor));
}
To avoid butterflies moving sideways or backward, I rotated each butterfly in the direction of its velocity. With the individual Butterfly component finished, I created a Butterflies component which positions multiple Butterfly instances based on positions of empties in a .glb I created in blender. This was the same approach I used for the bushes and it makes positioning objects a breeze!
As usual, this part was more work than I wanted it to be and looks worse than I hoped, but I’m still happy to have a decent finished product. The butterflies are just one more small detail that adds some life to the island.
Seagulls
I wanted to add a couple seagulls flying in the background. This is not meant to be a key element of the scene; the seagulls will be far away and not always visible and most users might not even notice them, so my goal was to make this quick. I found a perfect low poly seagull model online and quickly animated it in blender:
Since this is just one of many small non-primary elements of the scene I wanted to keep the file size small. I noticed when I exported from blender I ended up with a 3.5mb file. This seemed crazy for such a low poly model with only 9 frames of animation. I tried exporting the model without materials and noticed the file size went all the way down to 57kb. Wow! So it must have been the image texture taking up all that space, right? Well even in non-optimized .webp format the only texture used amounts to 59kb of space. I thought maybe there must be some sort of shader code or data included to make the file so large. But nope- shaders in a glb file are simply handled by small JSON chunks like this:
"materials": [{
  "name": "SeagullMat",
  "pbrMetallicRoughness": {
    "baseColorFactor": [1,1,1,1],
    "baseColorTexture": { "index": 0 },
    "metallicFactor": 0.0,
    "roughnessFactor": 1.0
  }
}]
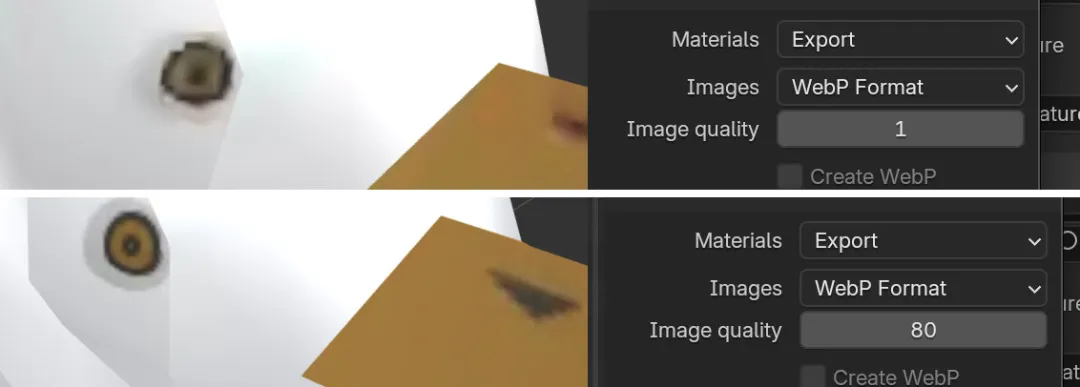
So what was the culprit? Based on some research it seems Blender’s glTF exporter re-encodes images from scratch at export time. This process ignores the original texture, instead creating a brand-new PNG file, often causing the file size to balloon significantly. So what if I try changing the material export settings within blender?
Well even with the image quality turned down to 1, we still get a 3.5mb file (probably because .pngs aren’t as compressible due to being lossless). Changing the image to jpeg format gets us down to 1.9mb and using webp gets all the way down to a 225kb .glb with a noticeable decrease in quality. If we go up to 80 quality in the webp format we end up with a 425kb file. For the sake of convenience that tradeoff might be fine for some cases, but that’s still a lot larger than the under 120kb file we get when we keep blender away from the images entirely, not to mention the reduction in quality.
To animate the seagulls I thought it would be nice to use theatre.js. What I’ve seen about it made it seem like an amazing way to animate threejs objects right inside of the browser window and I’ve been wanting to give it a try for a while. I spent a lot of time learning about theatre.js and animating the flight path of the seagull only to realize that the process was much more difficult than animating in Blender. Maybe this was just my experience, but I ran into a lot of bugs and odd behaviors with theatrejs. I was willing to look past those until I had spent a bit of time with the keyframe editor and found it to be very limited. Back to Blender!
I created the flight path in Blender and after some struggle to get the animations to export correctly, I was back in the code. I wanted two seagulls so I cloned the mesh and put two of everything for the seagull in my component with one seagull offset and scaled down slightly:
<group ref={seagull1} name="Seagull_Armature" scale={1.5}>
  <skinnedMesh
    name="Flying_seagull"
    geometry={skinnedMesh.geometry}
    material={material}
    skeleton={skinnedMesh.skeleton}
  />
  <primitive object={bone} />
</group>
<group
  ref={seagull2}
  name="Seagull_Armature"
  scale={1.2}
  position={[1.5, -0.5, -2]}
>
  <skinnedMesh
    name="Flying_seagull"
    geometry={skinnedMesh2.geometry}
    material={material}
    skeleton={skinnedMesh2.skeleton}
  />
  <primitive object={bone2} />
</group>
After looking at some seagull flight reference videos I noticed that an entire group of birds would be displaced by wind together and within the group the individuals also moved with their own random displacement. I also noticed that seagulls don’t always flap their wings constantly and they often angle their bodies and wings to sort of ride the wind like a surfer on a wave.
I had the seagulls flap their wings for a few seconds, then stop for a few seconds, then continue in a cycle. I didn’t want them to flap at the exact same time, but I thought it would add some character to have the front, larger seagull be kind of a “leader” and have the second seagull copy the flapping of the leader with a small time delay. So the front seagull flaps first and the second one flaps shortly after.
To achieve a semi-realistic seagull flight motion I used sin and cos functions again to give the seagulls a bit of random floating movement. I initially reached for drei’s Float but it wasn’t quite configurable enough for the float behavior I wanted. To roughly approximate what I noticed in the references, I gave the entire group some movement in all three directions as well as one of the individual seagulls. Each seagull also has its own random rotational movement to mimic the look of riding the wind currents.
…aaaand then I moved the seagulls super far away in the background so you can barely see them. Hopefully the tiny details matter as much as I’m betting they do!
The seagulls took way too long! But at least I got to learn about:
- Cloning gltf objects
- Theatrejs
- Animating empties in blender to drive motion in threejs
- Optimizing material export from blender
- Exporting animations from blender
If I have enough time I’d like to add a few more animated animals or other elements to the island, so hopefully I can draw on this experience to implement the next ones more quickly.
Sand
The grass was looking much better, but the sand was still pretty bland. I decided to try hand painting the sand texture in blender using a graphics tablet. I’ve hardly ever used a graphics tablet before, but even without being used to it I found it significantly more expressive than using a mouse. It was very quick and easy to add the details I wanted thanks to the combination of being able to paint more precisely and using pressure sensitivity. I’ll definitely keep an eye out for opportunities to use a graphics tablet more in the future.
Conclusion
Overall, this project was an incredible learning journey. By diving deep into shaders, animation, performance optimization, and procedural movement, I’ve built a better foundation of experience I can leverage in future projects. If I could do it all over again, I would prioritize on the user’s experience above everything, exploring ways to hold their attention, evoke emotion, and encourage interaction.
Through this Three.js Journey challenge I’ve realized that the building an engaging scene has almost nothing to do with technical complexity and a lot more to do with how the elements enrich the user’s experience. In future projects I want to put a greater focus on questions like these: What catches the user’s eye? How does the user feel while interacting with the scene? When they are experiencing the scene what are they doing at a micro level? And how memorable is the time they spend?
This project was a lot of fun, and although there are always elements I would love to add, I’m happy with the result. I can’t wait for the next challenge!